Have some leftover LED strips? Let’s make something exciting with it. All you need is a silicon LED diffuser within which you have to insert your LED strips. Light it up, and guess what? You just made a DIY neon light!
Though making LED neon lights using silicon LED diffusers and LED strips is easy, choosing the right strip and diffuser is the trickiest. You need a translucent silicone diffuser to get the neon light effect rather than the opaque or transparent ones. The diffuser’s length, size, shape, and color are also crucial factors. Besides, the type of LED strip you use, its IP rating, and the CCT rating also matter.
Apart from all these, you should know how to size the diffuser, cut the strips, and install and power them up. No worries. I have added all these facts to this guide. Go through it and make your desired LED neon light with a silicone LED diffuser and LED strip light:
What Is LED Neon Light & What Is It Used For?
LED neon lights, also known as LED neon flex, are popular alternatives to traditional glass neon lights. These fixtures use LED technology to imitate the glowing effect of neon gas-filled glass tube lights. Unlike conventional neon lights, LED neon lights don’t use glass or toxic elements. Instead, they have LED chips within a silicon or PU outer covering, allowing maximum flexibility. You can bend them to your desired shape and cut them off to fit any location. To learn more about LED neon light, check this- The Ultimate Guide to LED Neon Flex Lights.
The popping lighting of these fixtures makes them suitable for signage and advertising purposes. The most common applications of neon lights include-
- Signage & Exhibit Lighting
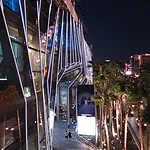
- Building facades
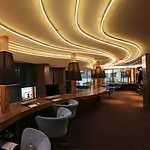
- Cove lighting
- Retail displays
- Architectural lighting
- Marine Lighting
- Automobile Lighting
- Artwork Lighting
- Special Event Lighting
- Home Lighting
The prior advantage of using LED neon flex over traditional glass neon is its energy efficiency. LED neon lights run at low voltage and use minimal energy to produce light. Besides, they can last from 50,000-100,000 hours. In contrast, glass neon light uses high voltage and is less energy efficient than LEDs. Besides, they can last only 10,000 hours, much less than LEDs. All these make LED neon lights a popular option to replace glass neons. To learn more in-depth, check this: Glass Neon Lights vs. LED Neon Lights.
What Is A Silicone LED Diffuser?
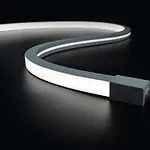
Silicon LED diffuser is a variant of diffuser used with LED strip lights. Like other diffusers, it blends the lighting of the LED chips on the PCB. Thus, the hotspot created in the LED strips is not visible, providing a smooth illumination. These silicon LED diffusers are made of high-quality silicon that keeps the LED strip completely sealed. So you can use them in areas where you need waterproof lighting.
The silicon diffusers in neon lights are made by three three-color silicone integrated extrusion shaping processes. This enhances their protection grade and makes them resistant to saline solutions, acid & alkali, corrosive gasses, fire, and UV. You can install them both indoors and outdoors without worrying about water or dustproofing.
Why Use Silicone LED Diffuser For DIY LED Neon Light?
The LED neon flex you get from the market is usually made by inserting LED strips into silicon or PU diffusers. So you can easily make them yourself. But why would you choose a silicon diffuser to make neon lights? Here is the reason-
- Diffused lighting for neon effect
The translucent silicone diffuser works great to scatter the light. So, when you insert LED strips inside the diffusers, the lights from all the chips get diffused, resulting in a smooth, even glow. This diffused light then mimics the neon effect.
- Flexible to shape (Cuttable & bendable)
Silicon is highly bendable. You can bend them to your desired shape to create the neon signage. Besides, the flexible structure of the silicon also allows you to cut them to your required size. This way, you can create customized neon lighting for your project. Check this to learn about DIY neon signs- How to Make a DIY LED Neon Sign.
- Color option
You will find a wide range of color options in Silicon diffusers. Besides the standard white diffuser, they are available in black, pink, green, ice blue, teal, etc. Using these colorful diffusers, you can go for amazing DIY decorative neon lighting.
- Waterproof
Silicon keeps your LED strip covered and sealed. So, you can create an IP67 to IP68-rated DIY neon light using these diffusers. This will be suitable for outdoor, poolsides, fountains, or any area that comes in contact with water.
- Heat & chlorination resistance
You can install your DIY neon lights in areas that require heat-resistant fixtures. Thanks to the temperature resistance capability of the silicon diffuser, it is suitable for such installation. They are resistant to corrosive gasses and fire. You can use them in the undercabinet lighting of your kitchen, garage, or outdoors. Besides, these diffusers are also chlorination resistant. So, you can use them for swimming pool lighting.
- Easy to clean
Silicone is a non-porous material. So, there are no tiny holes or gaps where it will just accumulate. You can easily clean them with a fabric. Above all, silicon diffusers are water resistant. You can wash them with water if necessary.
Things To Consider To Make LED Neon Light With Silicon LED Diffuser & LED Strip Light
To make a DIY neon light, you need to pick the right LED strip and diffuser to get the neon effect you want. Here are the things to consider for this:
1. Type Of Silicone LED Diffuser
LED silicon diffusers can be translucent, semi-translucent, or opaque. For neon light, you need to go for translucent diffusers. These diffusers allow light to pass through but scatter them to some degree. This gives the neon light effect. However, with semi-translucent, you will get a faint glow that will not mimic the neon effect entirely. As per the opaque diffusers, the light will get blocked, which is not suitable for neon light.
Again, pigmented or colorful LED silicon diffusers are also available. For instance, purchase red diffusers if you have white LED strip lights and want to make a red neon light. This way, you can experiment with colors.
Besides you should also consider whether you need an adhesive backing silicon diffuser. Buying these will make your installation much more quick and convenient. To learn more, check this- How To Choose An LED Diffuser For Light Strips?
2. Shape & Size Of The Silicon LED Diffuser
The silicon LED diffusers are available in different structures or shapes. They can be round, half-round, square, or rectangular. You can select the one that suits your neon lighting design best. For instance, if you want to mimic the appearance of traditional glass neon light, go for round silicon diffusers. This will give a tubular shape to your neon light, just like glass tubes.
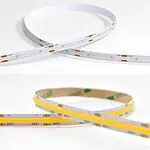
The diffuser’s size depends on the LED strip’s width and length. So, you first need to know the width of your LED strip and then select the diffuser that can fit in. The common widths of LED silicon diffusers are 8mm, 10mm, 12mm, 20mm, and wider. You can also look for a wider diffuser that fits two LED strips side-by-side. This depends on your preference and the design you want to create. Check this to know the width of LED strips: What LED strip widths are available? This guide will help you pick a suitable diffuser.
3. Color & Type Of LED Strip Light To Use
Your DIY neon lighting output will depend on the type or color of the LED strip you use. If you want plain monochromatic neon light, use single-color LED strips. Again, you need to purchase a CCT LED strip for a color temperature-adjustable neon light. You can go for tunable white LED strip lights. These fixtures allow you to adjust the color temperature from warm to cool range. Check out Tunable White LED Strip: The Complete Guide to learn more about these LED strips. Again, you can also use dim-to-warm LED strips if you want adjustable warm neon lights. You can adjust the color temperature from 3000K To 1800K. For details about these strips, read this guide- Dim To Warm – What It Is and How Does It Work?
You need an RGB LED strip if you want a multi-color or color-changing neon light. Using these strips, you can create about 16 million neon hues! These strips have a few more variants: RGBW, RGBWW, RGBIC, etc. To learn what they mean, check this- RGB vs. RGBW vs. RGBIC vs. RGBWW vs. RGBCCT LED Strip Lights.
However, the most interesting DIY neon lighting you can make is using addressable LED strips. They give you control over each segment of the strips. Thus, you can bring a rainbow effect in your neon light. This is also known as dream color lighting. This addressable neon lighting is perfect for restaurants, pubs, or any party lighting. Read this guide to learn more about addressable LED strips- The Ultimate Guide To Addressable LED Strips. Not clear enough? Check the table below to pick the right LED strip for your DIY neon lighting:
| DIY Neon Light | Combination Of LED Strip & Silicon Diffuser |
| Single-color LED neon lights | Single color LED strip lights + Silicone diffuser |
| Dimmable LED neon lights | Tunable White LED strip lights + Silicone diffuserOr, Dim-to-warm LED strip lights + Silicone diffuser |
| Multi-color LED neon lights | RGBX LED strip lights + Silicone diffuser |
| Color-changing LED neon lights | |
| Dream color addressable LED neon lights | Addressable LED strip lights + Silicone diffuser |
4. Length Of Strip Light
You need to measure the installation area to determine the required length of the LED strip. If your DIY neon lights are to be mounted in straight lines, the length is simple to measure. However, the length measurement can be tricky if you make neon signage. You can follow a trick: shape a rope according to how you want to design the neon light. Then, measure the rope’s length. This way, you will find the required size of the LED strip.
However, 12V or 24V LED strips mostly come in a 5-meter reel. But you will find longer strips for large installations. To learn about the available lengths of LED strips, check this: LED Strip Length: How Long Can They Actually Be? Apart from these, there is an option to connect multiple strips to extend the length. So, there is nothing to worry about size. Even if you cut the strips too short, you can fix it by joining additional strips using the LED strip connector. This guide will help you in joining multiple LED strips-How To Connect Multiple LED Strip Lights.
5. Voltage
Voltage rating is a crucial consideration when picking the ideal LED strip. For DIY projects, low-voltage LED strips are the best option. They are safer compared to high-voltage strips. Working with low-voltage LED strips will make your task easier because you don’t go to professionals for DIYs. However, you will get longer runs and consistent brightness with high-voltage LED strips. Longer runs are also possible with low-voltage LED strips by joining multiple strips in parallel.
However, 12V or 24V LED strips mostly come in a 5-meter reel. But you will find longer strips for large installations. To learn about the available lengths of LED strips, check this: LED Strip Length: How Long Can They Actually Be? Apart from these, there is an option to connect multiple strips to extend the length. So, there is nothing to worry about size. Even if you cut the strips too short, you can fix it by joining additional strips using the LED strip connector. This guide will help you join multiple LED strips. How do you connect multiple LED strip lights?
6. IP rating
The silicon diffuser gives your DIY neon lights water and dust protection. Yet, a water-resistant LED strip must be used inside the diffuser for complete waterproofing. Consider the IP rating to decide whether the LED strip is dust and waterproof. IP stands for Ingress Protection. A higher IP rating gives better protection against liquid and solid ingress. If you are making the neon light for indoor uses that don’t have direct contact with water, a lower IP rating will work.
For outdoor usage, a higher IP rating is a must. For example, a neon light outside your shop will face weather conditions like wind, dust, rain, storms, etc.; to keep the fixture safe in such weather, you need to go for higher ratings. Analyzing the water contact, you can go for IP65 or IP66. If it faces heavy water contact, you can go up to IP67. But, if neon lights remain submerged in water, IP68 is a must. To learn more about IP ratings, check this: IP Rating: The Definitive Guide.
7. IK Rating
Suppose you made a DIY neon signage for your table. It can somehow fall or get hit by any object. You will need to consider the IK rating to ensure the light you made remains undamaged in such a condition. IK stands for Impact Protection, which is rated from 1 to 10. As your LED strips already have a silicone covering, it will work as a shield. So, for indoor installation, a higher IK rating is not mandatory. But if you install the light fixture outdoors, there is an option for a moderate IK rating even if you use a diffuser. This will ensure your LED strips are safe and that the LED chips go through without damage. To learn more, check this- IK Rating: The Definitive Guide.
8. CRI
CRI stands for Color Rendering Index. It determines the color accuracy of an object under artificial lighting. So, to ensure your DIY neon light shows the proper color, go for a higher CRI. Otherwise, you may face issues with the visual apparel of a product under these lights. CRI is especially important for commercial lighting in shops or retail stores. To learn details about CRI, check this- What is CRI?
DIY LED Neon Light With Silicon LED Diffuser & LED Strip Light
It’s time to implement your DIY project after purchasing the appropriate LED silicon diffuser and LED strip lights. Here is how you need to make the neon light:
Step 1: Select The Location & Plan Your Lighting
Consider where you are going to install the DIY neon light- indoors or outdoors. Then, choose the design of the neon light. For this, you must be clear about the purpose of the lighting. If you are using neon light under the cabinet or as cove lighting, there is nothing to think much about with the design. However, when making DIY neon signs, you need to draft a clear design and pattern to implement them. Neon signage deals with different shapes and letters; you will also need to add multiple colors to design a signage. So, pre-planning is essential. Better create a rough sketch of the outcome result you expect. Check this article to get designs for your DIY neon light- Top 26 Creative Neon Sign Lighting Ideas (2024).
Step 2: Gather The Essential Materials
After having the plan and design fixed, gather all the essentials you need. Here is what you will require for your DIY neon lighting-
- Silicone LED diffuser
- LED strip lights
- Measuring tape
- Power supply
- Connectors and wires
- Mounting tools
- Optional: controllers for customization
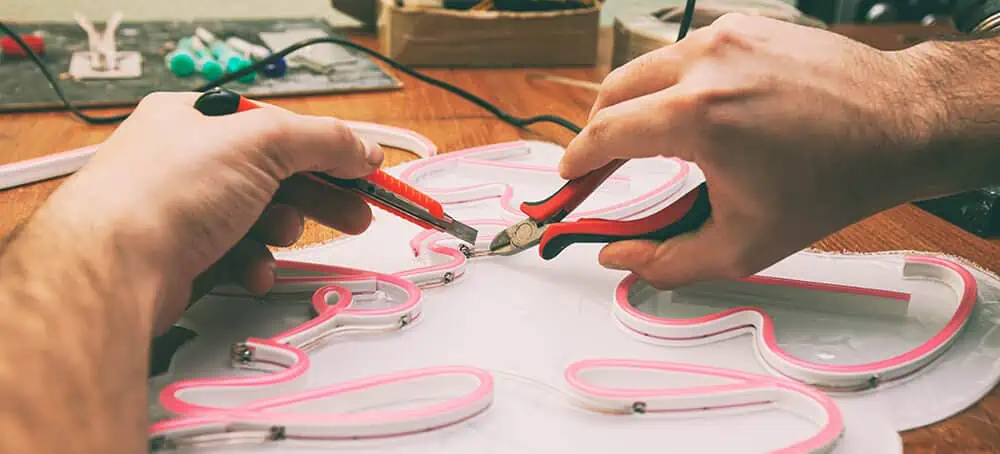
Step 3: Prepare the Silicon Diffuser and LED Strip
Measure the amount of LED strips you will need and cut the strips to the required size. You will find cut marks for the scissor icon on the fixture’s PCB. Follow the markings to cut them. This guide will help you with details of the strip-cutting procedure- How to Cut, Connect, and Power LED Strip Lights. Next, take the LED silicon diffuser and cut it to match the size of the LED strip. Silicon is soft and flexible, so you can easily cut it with a sharp scissor.
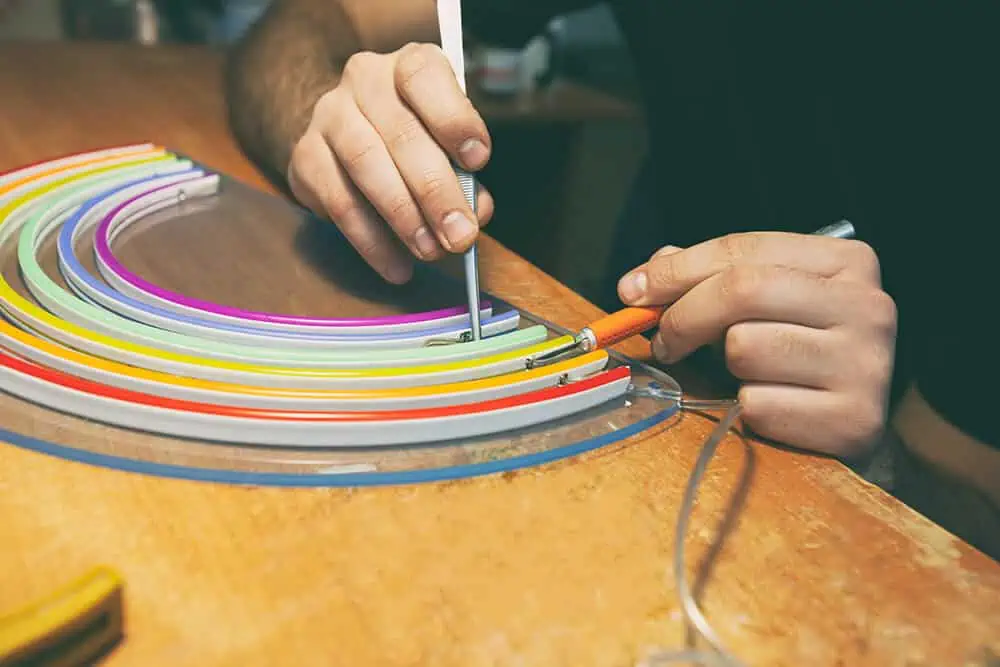
Step 4: Insert The LED Strip Into The Silicon Diffuser
Now, insert the sized LED strip into the silicon diffuser. Ensure the LED strip is properly positioned in the diffuser channel. You may need to bend the stripes and the silicone diffuser to fit your design requirements. So, to ensure the strips remain set inside the diffuser, remove the adhesive backing of the strip and fix it with the diffuser channel.
Step 5: Wiring
Connect all the LED strips together using the LED strip connector. Use end caps on both sides of the silicon diffuser for professional finishing. This will seal the entire lighting. As per the wiring, you can also go for soldering for a more robust installation. This will give your DIY project a more professional outlook. But if you are not confident enough to work with the soldering, an LED strip connector is the quick and easy solution. After wiring, test the LED strips by connecting them to the power source. Testing the lights in this stage is essential. Because it will be a complete mess if you find the wiring is not right after mounting the fixture, you’ll have to start from the beginning.
Step 6: Mount The DIY Light To Your Desired Location
Once your DIY light is set, you can install it in the desired location. For installation, you can go for the adhesive backing technique. Some LED silicon diffusers come with adhesive backing. Suppose your one doesn’t have any, no worries. Purchase adhesive tapes and stick them to the back of your diffuser. This guide will help you pick the ideal tape: How to Choose The Right Adhesive Tapes For LED Strip.
Besides this, you can also use a clipping method to install the light. Here, you will need to drill holes and use clips to fix them on the wall. Check this guide for details about this process- Installing LED Flex Strips: Mounting Techniques. However, the hanging or suspension method of mounting neon lights is also popular. So, analyze the location and your lighting purpose and pick the best mounting technique.
Step 7: Power It Up
Now that your DIY neon light is installed, it’s time to power it up. Connect the ending wires of the LED strips to the power source and the LED driver. Make sure to maintain polarity. Always connect the positive end of the wire to the positive end of the driver and the negative to the negative. If the polarity is not correct, the light will not glow.
To learn the detailed process of connecting LED strips to a power source, check this: How to Connect LED Strip to Power Supply? Once you are done with the connection, turn the switch on and watch your DIY neon light glowing. If the light doesn’t illuminate, check the wiring and retry.
Don’t Want To Take DIY Hassles? Go For LED Neon Flex
If you don’t want to take the hassle of DIY LED neon light making, go for a ready-made solution. In this case, LED neon flex is what you need. These professional-grade LED neon lights are available in a wide range of colors. You will also find variations in materials; for instance, LED neon flex is available in silicone and PU variants.
Using these lights will save you much more time. All you need to do is purchase them and install them. These flexible light strips are also bendable, so you need not worry about shaping them to get the desired design. But from where will you find quality LED neon flex for your project? LEDYi is your ultimate solution!
Our LED neon flex is built of eco-friendly silicone and PU glue. You can easily cut them to your required size and shape them as desired. In terms of bending, we offer you four variations of our LED neon flex. These include-
- Horizontal Bend Series
- Vertical Bend Series
- 3D(Horizontal & Vertical) Series
- 360° Round Series
You can choose any of the above based on your design needs. For more advanced facilities, you can also purchase our wing-designed neon flex. This LED neon flex has a trim, so you need no mounting profiles. Besides, they fit perfectly into the space, requiring no installation gaps. For indoor neon lighting, these fixtures are ideal. You will get them an IP44 rating for indoor outline lighting. Apart from this, we also have our DMX512 & SPI Neon Series.
In short, you will get all categories of neon lights from LEDYi. Besides, if you need any customization requirements, we are also open to them. Therefore, there is no need to spend your valuable time on DIY; simply go for our LED neon flex. You can also check this list to find suitable companies, such as the Top 10 LED Neon Light Manufacturers and Suppliers in China (2024).
FAQs
The Bottom Line
You should purchase high-quality LED strips to make neon lights using silicon LED diffusers. Keep in mind the lighting design to get the desired effect. This will help you in getting the right LED strip and silicone diffuser. For instance, buy an RGB LED strip for a color-changing neon light. Again, for adjustable white color LED neon light, go for tunable white LED strips. Also, consider the IP rating of the LED strips when you buy.
When making the neon light, ensure correct wiring and use end caps on your silicone diffuser to seal them. However, if you want an easy solution, go for our LEDYi neon flex. All our fixtures have been tested to have more than IP65. So, our neon lights are safe for outdoor use. Besides, our fixtures have LM80-compatible LEDs that last up to 50,000 hours. We further offer 3 -5 years of product warranty to assure quality. You can also request customization and a free sample.
Yet, if you want to keep it DIY, we offer you a wide range of LED strips, LED strip connectors, drivers, and controls that you will require in your project. Therefore, order from LEDYi ASAP!