While working on larger LED strip lighting projects, you often need to deal with multiple strip connections. While doing so, the common issues you will face are loose connection, voltage drop, and inconsistent lighting. To avoid these, you must know the correct method of connecting multiple LED strip lights. Here, I’m sharing the same.
You can connect multiple LED strip lights by soldering or using LED strip connectors. If you prefer ease of installation, go for a strip connector. But for permanent and more robust connections, soldering is best. As per the wiring method, you can go for a series or parallel circuit. In this case, the voltage rating of the LED strips and the total run length are essential considerations.
Apart from these, selecting compatible LED strip connectors is also essential. If you use a connector that doesn’t match the LED strip variant, the connection won’t work. But no worries, I have covered all these factors in this guide. So, why wait any more? Go through the article and learn about the proper method for connecting multiple LED strips for your project-
Is It Safe To Connect Multiple LED Strip Lights?
One added benefit of using LED strip light is its flexible length increment. You can easily add multiple strip lights together to extend the length. But is it safe? The easy answer to this question is, unless the power source is not overloaded, you can add multiple strips. That is, the total power consumption of the joined LED strips should not exceed the power supply limit limit.
If the power source is overloaded, it can cause fire breakouts. Besides, faults in the LED strips can also cause safety issues. Here are some facts that you should consider to connect multiple LED strip lights safely:
- Calculate the voltage of the combined LED strips in advance. Ensure the voltage of the power source should not be less than the voltage of the LED strips. If your LED strips are 24V, the power source should also be 24V. If you use a 12V power source for 24V LED strips, it can cause fire breakouts.
- Always use high-quality LED strips for safety. Low-quality LED strips are composed of inferior materials that can face operational issues when connected with multiple fixtures. In this case, go for our LEDYi LED strips for reliable quality. You can also check this guide for the best deal- Top 10 LED Strip Light Manufacturers And Suppliers in WORLD (2024).
Advantages Of Connecting Multiple LED Strip Lights
Combining multiple strips is your ultimate choice if you are going for a large LED strip installation project. Besides covering large spaces, it also brings other additional benefits. This includes the following:
Extended Length & Large Area Coverage
Length extension is the number one benefit of connecting multiple LED strips. Usually, LED strips come as a 5-meter reel. You can connect multiple strips if you need more than this length while covering a large area. Besides, you can connect the strips to small sizes for angles and edges. Thus, you will get finished lighting in the curved areas.
Brighter Light By Adding Them In Chain
You can add multiple strips in parallel to create a brighter lighting effect. This technique is great for dark spaces. Besides, it will also give a dramatic look to your room.
Customized Lighting
You can get greater control by adding multiple LED strips for customized lighting. For example, you are backlighting a mirror with LED strip lights. In doing this, you can cut the LED strip to four lengths that match the height and width of the mirror. Then, combine all four strips and power them to a single source. This will make your DIY projects more accessible. To learn the detailed guidelines of mirror lighting, check this- How To DIY LED Light Strips For Mirror?
Cost Efficient
Connecting multiple LED strips, you need not worry about several power adapters and outlets. Thus, it can reduce the overall cost. Besides, you can also use dimmers to keep the light dimmed for energy saving.
Facts To Consider While Connecting Multiple LED Strip Lights
You must consider some factors for an effective and safe connection while joining multiple LED strips. These are as follows-
Ways Of Connection
You can connect multiple LED strips in series or parallel circuits. The details about these wiring methods are as follows-
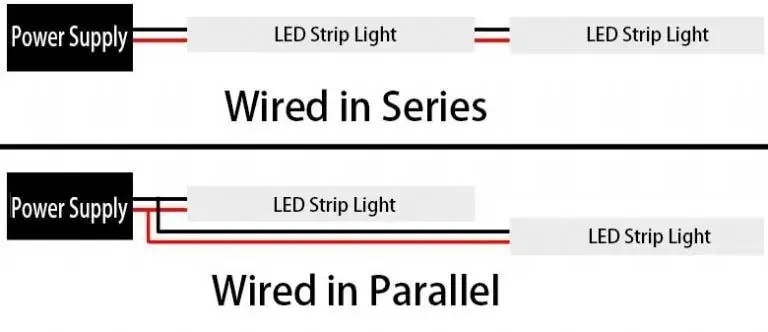
- Series
Connecting LED strips in series circuits is the easiest way. Here, all you need to do is add the end of one strip to the start of the other using an LED strip connector or soldering. You do not need to make separate wiring to connect each set of strips to the power supply. This makes the installation easier for beginners and DIY projects.
A series connection of multiple LED strips is ideal for short-term installation. However, the strips will face major voltage drop issues as the length increases. This is the major drawback of a series connection. In this connection process, the power is provided only at an end. So, with the increases in length, the voltage reduces, and so is the brightness of the strips. Thus, inconsistency of brightness is visible.
- Parallel
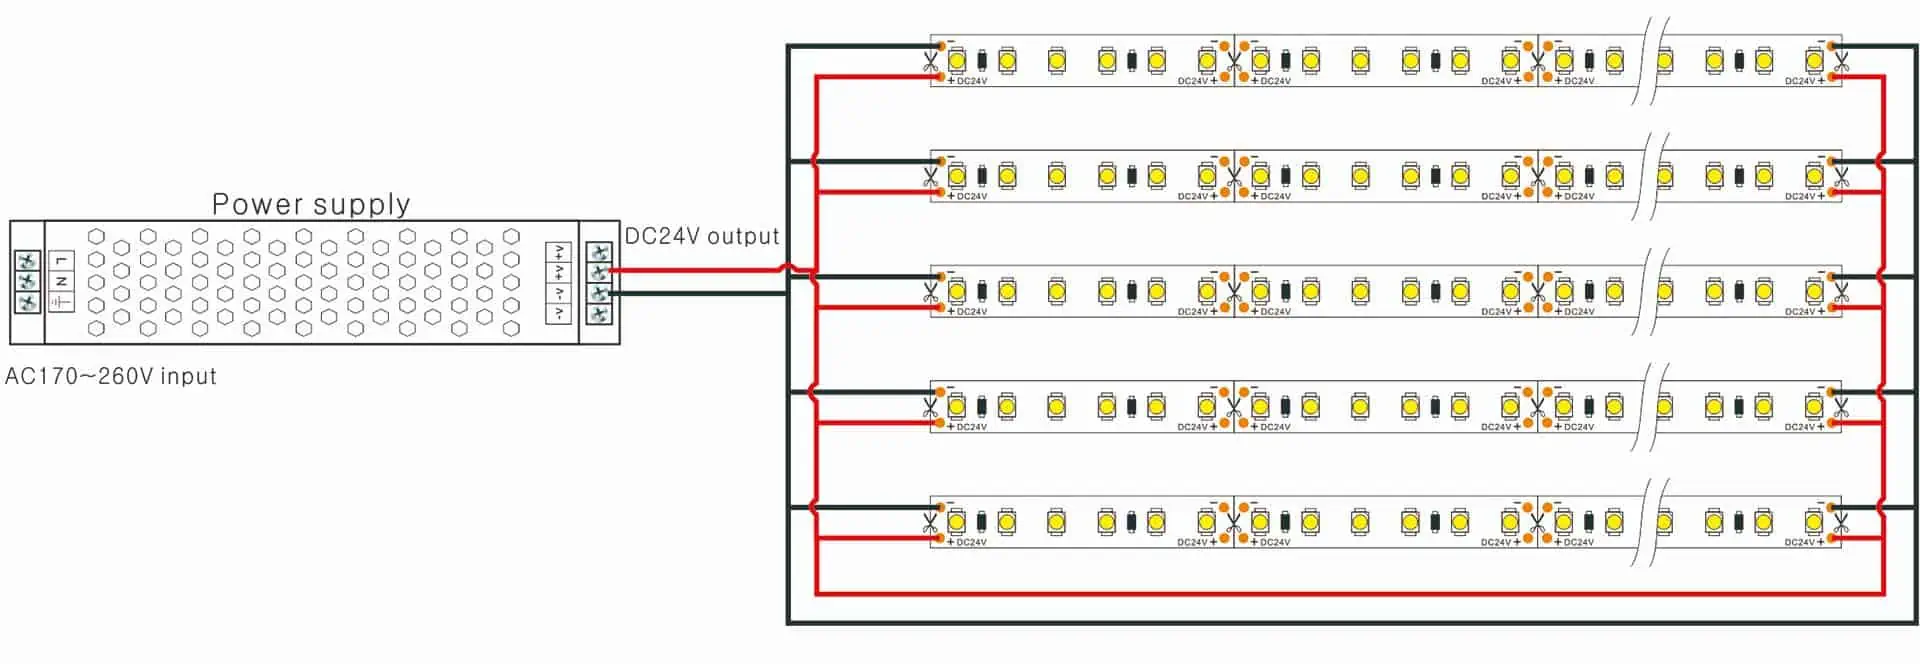
A parallel connection is more professionally approved when joining multiple LED strips together. In this process, each strip is connected directly to the power source with parallel wiring. Thus, each strip gets adequate current flow to maintain consistent brightness.
However, the major drawback of parallel connection is its tricky wiring. You will need to work with several wires and run them to the power source from different points of the LED strip length. Besides, most power supply units consist of single positive and negative output wires. So, when you join several wires from the LED strips to the power source, you will need to split the power supply output into several wires. This makes the installation challenging for beginners. Again, the voltage drop increases if the LED strip sections are located far apart from the power source. It would help to buy sufficient gauge wires that cover long runs to prevent this. This way, the expense for parallel connection will be higher. For information, please check How to Wire LED Strip Lights(Diagram Included).
Maximum Numbers Of LED Strips To Connect In A Chain
If you connect too many LED strips in a single chain, the driver’s lifespan will be shortened. This is why limiting the number of strips per chain is better. Here is the formula to follow in deciding the appropriate number of LED strips in a single chain-
| Number of Strips= Power Supply(in Watts)/Power Consumption by one strip |
So, if the power supply is 500 watts and the power consumption per LED strip is 100 watts, the required number of LED strips will be:
Number of Strips= 500 watts/100 watts= 5 strips
However, avoid putting a 100% load on the power supply. Keep 20% of the load off to reduce stress on the power source. In this case, the best practice would be to use 4 LED strips max instead of 5. Thus, you will get optimal performance from the LED strip and an extended lifespan. For more information, please check How To Choose the Right LED Power Supply.
Robustness Of The Connection
Whether you connect the LED strips in series or parallel, robustness matters the most. If the connections are not strong enough, they will loosen, breaking the circuit. Thus, the lights will turn off. So, you should be very careful about the robustness of the connection. Using LED strip connectors is easier and more convenient for newbies. But they are not so robust. As time passes, there is a chance of losing the connection. Besides, the heat of the fixture may melt the plastic connectors, making them loose.
So, if you want a stronger connection, go for soldering. Though it requires professional skills, you will get a permanent solution. However, you will need to heat the soldering iron and pre-tinting, making the procedure tricky for the beginner. Yet, it will give a solid connection, minimizing the chances of disconnection. You can check this to learn about LED strip connection: Can You Cut LED Strip Lights and How To Connect: Full Guide.
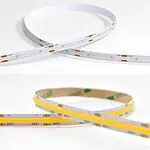
Types Of LED Strip Connector
The connector type is a crucial consideration when using LED strip connectors to join multiple LED strips. They can be gapless pin connectors or jumper cord connectors. The gapless pin connectors have pins that fit into the endpoints of the LED strip. This way, they form a continuous strip flow connecting multiple LED strips. Based on PINs, LED strip connectors can be of several types. Each of these connectors is designed for specific LED strip variants. For instance, if you want to connect multiple Tunable white LED strips, you will need a 3 PINs LED strip connector. Below, I’m adding a chart for different LED strip connectors suited for varying LED strip variants-
| LED Strip Connector | Type Of LED Strip Light |
| 2 PINs LED Strip Connector | Single-color LED strips |
| 3 PINs LED Strip Connector | Tunable white LED strips & Addressable LED strips |
| 4 PINs LED Strip Connector | RGB LED strips |
| 5 PINs LED Strip Connector | RGB+W or RGBW LED strips |
| 6 PINs LED Strip Connector | RGB+CCT & RGB+Tunable white LED strips |
Jumper cord connectors are mainly extension cords used to join one strip to the other. These cord-style LED strip connectors provide greater flexibility. If you connect multiple LED strips for areas with corners, jumper cord connectors are the best choice. They allow you to bend the LED strip with convenience.
However, based on IP ratings, LED strip connectors can be divided into different categories. For example-
- IP20-non-waterproof LED strip connector
- IP52-single side glue coating LED strip connector
- IP65-hollow tube waterproof LED strip connector
- IP67/IP68-solid tube waterproof LED strip connector
Apart from all these, if you consider the shape and function of the strip connectors, they can be COB LED strip connectors, LED Strip 90-Degree connectors, Hippo-M LED Strip Connectors, etc. Again, you should also consider the PCB width of the LED strip light when purchasing connectors. If your LED strip connector is bigger or smaller than the LED strip, it won’t fit. The common width of LED strip connector includes-
- 5MM
- 8MM
- 10MM
- 12MM
Length Of The LED Strip & Voltage Drop
When joining multiple strips together, keep an eye on the length of the strips. As the length increases, the voltage drop also increases. As a result, the LEDs in the strips begin to dim as the length runs. This causes brighter illumination at the beginning of the strip that is connected to the power source. The LEDs start losing their brightness as the strip runs away from the power source.
| Length ⇑ Voltage Drop ⇑ |
This LED strip length is connected to the voltage of the fixture. Low-voltage LED strips support shorter lengths. For instance, 12V LED strips can provide uniform lighting up to 5m. As you increase the length, they start facing severe voltage dropage. To avoid this, you need to inject external power into a specific point. This guide will help you with the power injection procedure- How To Inject Power Into LED Strip? High-voltage LED strips are good to go to avoid this hassle.
You can connect multiple high-voltage LED strips without external power injection. For instance, our 48V super long run LED strip light can run up to 60 meters for one end power feed. So, if you have 5m of these LED strips, you can connect 12 pieces of them with just one power source. No hassle of parallel connection on multiple points to maintain voltage rating. However, you must also consider the power consumption of the strips to decide the maximum number of LED strips to connect to a single power source.
Nevertheless, LED strips are available in various lengths rather than the ideal 5-meter/reel; for larger installations where you may want to avoid multiple connections, go for longer strip length. Read this guide to learn about the different lengths of LED strips corresponding to voltage ratings. What are the longest LED strip lights? However, the voltage requirement of LED strips differs with the application. Although high-voltage LED strips support longer lengths, they are unsafe for all installations or locations. This guide will help you choose the correct voltage for your project- Low Voltage Vs. High Voltage LED Strips: When to Choose and Why?
Method Of Connecting Multiple LED Strip Lights
As I said above, you can connect the LED stripe light in two ways, either using a connector or soldering. Soldering is a more reliable method for a robust connection. But if you are a beginner and looking for a convenient connection method, go for LED strip connectors. Below, I’m giving you the details of both processes:
Method#1: Using A Connector
LED strip connectors are available in different variants. To join multiple LED strips, you will need the strip-to-strip and strip bridge, strip-to-wire, and strip-to-power connectors. Here is the process of using a connector for joining multiple LED strips:
Step 1: Purchase the Right LED Strip Connectors
First, you need to check the type of LED strip you have. The pin numbers of the connectors differ for the LED strip category. For instance, if you have a single-color LED strip, you will need a 2-pin strip connector. Similarly, for RGB LED strips, a 4-pin strip connector is required. You should also consider the width of the LED strip when buying the correct connector. Again, if your LED strip is waterproof, you should go for IP67 or IP68-rated LED strip connectors to ensure proper sealing. Thus, whatever strip you purchase should match the LED strip types.
Step 2: Back Tape Peeling & Joining LED Strips Using Connectors
LED strips come with an adhesive backing for quick installation. First, remove some adhesive tape from the two ends of the LED strips. Then, connect the connectors to one end of the LED strip and connect it with the other piece of the strip. In doing so, make sure the positive and negative markings of the LED strip match those of the connector. This way, multiple LED strips can be joined together to increase the length.
Step 3: Cover The Connector
After connecting the LED strips, seal the connection by locking it with the plastic cover. Each of the connectors has a covering to seal the connection. Make sure to press the cover strongly for robust sealing. You can install the long runs of joined LED strips in the desired locations.
Method#2: Soldering
Soldering is a more professional approach to connecting multiple LED strips. To do this, you will need wires and soldering iron. Using these, you can get a permanent and more durable connection than strip connectors. Here is the process of this method:
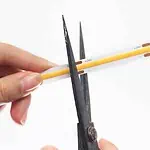
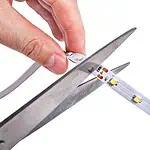
Step 1: Peeling Adhesive from the Solder Pads
First, ensure all the endings of the LED strips are neatly cut. Take one of the strips and peel off the adhesive backing from the soldering pad. This peeled LED strip will remain at the top while connecting with another strip.
Step 2: Heating & Applying Solder
Now heat the soldering iron and pre-tin the solder pad of the joining segment of the second strip piece that will remain beneath the first one. Heat the target spot rather than the solder directly at all times. You can start soldering after applying enough heat. Avoid inserting the soldier directly into the iron’s tip; instead, apply it to the heated region.
Step 3: Connecting The Strips
After that, place the non-tinned strip segment right on top of the freshly tinned pads and heat it. Remelt the solder and let it flow while holding the soldering iron in place. Make sure the strip doesn’t overheat. If it gets overheated, there is a possibility that the circuit casing will come out of the PCB substrate. Let the soldering cool, and all your LED strips will be connected. Add a tiny amount of solder to the pad’s top to strengthen the connection.
LED Strip Connector Vs. Soldering – Which Method Is Better To Connect Multiple LED Strip Lights?
If you consider convenience, using a connector is a more flexible method to connect multiple LED strips. You need no professional skills or instrument for such a connection. Just buy LED strip connectors from the market and clip them up to your strips. However, the cons of using these strip connectors are that they are more prone to getting loosened. So, for a permanent and more robust connection, soldering is best.
| Factors | LED Strip Connector | Soldering |
| Stability | Acceptable | High |
| Convenience | High Convenience | Low Convenience |
| Maintenance | Easy | Hard |
Series Vs. Parallel Connection Of Multiple LED Strip Lights- Which Is Better?
Whether a series or parallel connection is better for joining multiple LED strips depends on several factors. This includes the LED strips’ voltage, total run lengths, consistent brightness, and ease of installation.
You can go for a series connection if you have high-voltage LED strips. Even if you have low-voltage LED strips, you still can connect multiple strips in series unless there is no severe voltage drop. But there are potential chances of voltage drop in case of long runs. In this case, the series connection is not recommended. For information, please check Low Voltage Vs. High Voltage LED Strips: When to Choose and Why?
Parallel connection gives more uniform lighting and is ideal for large installations. So, even if you connect too many LED strips, all will get equal voltage. This is because each of the LED strips is connected to the main power source in parallel circuits. Though this gives consistent lighting from end to end, the installation is difficult. You will need additional wiring, multiple power supplies, and professional help to make a parallel connection. This makes parallel installation expensive compared to series.
| Series connection | Parallel connection | |
| Pros | Easy installationIdeal for beginners and DIY projectsLow cost | Consistent brightnessIdeal for large projects |
| Cons | Not ideal for large installationVoltage drop issues | Complex installationNeeds professional helpHigher cost |
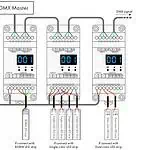
How To Connect Multiple LED Strips to a Power Supply?
You can connect multiple LED strips directly to the power supply with the socket or use an LED strip splitter. If you choose a direct connection, there is nothing new to learn. But in this case, you may require multiple power sources. So, a splitter is a good option. The process is simple. Take the splitter wires of one end and connect the LED strips. You can go for both series and parallel for this connection. Then, plug the other end of the LED splitter into the Power Supply Unit(PSU). For details, check this: How do I connect the LED strip to the power supply?
However, while connecting the LED strips to the power supply, ensure the power consumption and voltage ratings are compatible. Besides, stay within 80% of the power supply’s demand regarding the number of LED strip lights in the chain. For safety precautions, always save 20% of the load on the power supply instead of putting 100% into it.
FAQs
Conclusion
If you want constant brightness and more professional wiring, go for parallel wiring. But if you are not an expert and want an easy installation, use series wiring. In this case, you may face voltage-dropping issues with length increments. However, external power injection will solve this. As per joining the strips, LED strip connectors are an easy solution. You can check out our LED strip connectors; LEDYi has a wide range of connectors for different types and widths of LED strip lights. Apart from this, we also have LED drivers and LED controllers along with premium quality LED strip lights. In short, we will provide you with all the necessities to connect multiple LED lights