LED flex strips go through several adverse situations, like wind, dust, etc., directly or indirectly affecting their performance and durability. That is why ensuring appropriate LED flex strip installation is crucial. And for that, you must know about different mounting techniques to select the best method that suits your settings.
Mounting techniques are methods of securing the LED strip to the surface. Proper mounting ensures the strip sticks firmly and provides even light flow. There are mainly three mounting techniques for installing LED strips – adhesive, clip, and channel mounting. Depending on the application, the mounting technique may vary.
In this article, I will discuss various mounting techniques that you can use to install LED flex strips. I will also provide tips and tricks for each technique. Hence, you can choose the best mounting method for your specific needs.
What is the Mounting Technique for LED Strips?
The mounting technique for LED strips is a way to install LED strips securely. It involves attaching the LED strip to a surface, such as a wall or ceiling, and ensuring it stays in place.
There are different types of mounting techniques. But every technique is not appropriate for all installation purposes. For example, temporary LED strip installation by drilling is wrong as it permanently damages the wall. In this case, going for adhesives is the best decision. So, choosing the ideal mounting technique is essential to avoid incorrect installations. And for that, first, let’s know about the different mounting techniques-
Types of Mounting Techniques
There are different mounting techniques for LED strips; these are as follows-
A. Adhesive Mounting
Adhesive mounting for LED strips indicates sticking the strips to the surface using double-sided adhesive tapes. Here are the types, pros, and cons of adhesive mount:
1. Types of adhesive for LED strips
Double-sided tape is the most popular category of adhesives for mounting LED strips. They are easy and quick to apply. However, there are different varieties of double-sided tapes, like-
- 3M 200MP
- 3M 300MP
- 3M 9080
- 3M VHB 5608N
- Tesa 4965
- Blue Thermal Tape
Of all these, 3M VHB is the strongest one. To know more about double-sided tapes for LED strips, check this- How to Choose The Right Adhesive Tapes For LED Strip.
2. Pros and cons of adhesive mounting
Though adhesive mounting is the easiest and quickest of all mounting techniques, it has some drawbacks. So, let’s know about the benefits and disadvantages of the adhesive mounting technique:
| Pros | Cons |
| Quick installationRequire no drilling, screwing, or other instruments for installationTime-saving method Removable Cost-effective | Have chances to get looseMay damage the wall while removing the tapes |
B. Clip Mounting
In the clip mounting method the LED strips are installed on the surface using clips. These clips can be metallic or plastic. Clipping is a more stable mounting technique than adhesive. This process includes drilling, nailing, screwing, etc. However, there are different types of clips available in the market; these are as follows:
1. Types of clips for LED strip mounting
You will find many options in choosing the clips for mounting LED strips. Among all those, the most popular and useful clips to use for strip mounting are as follows:
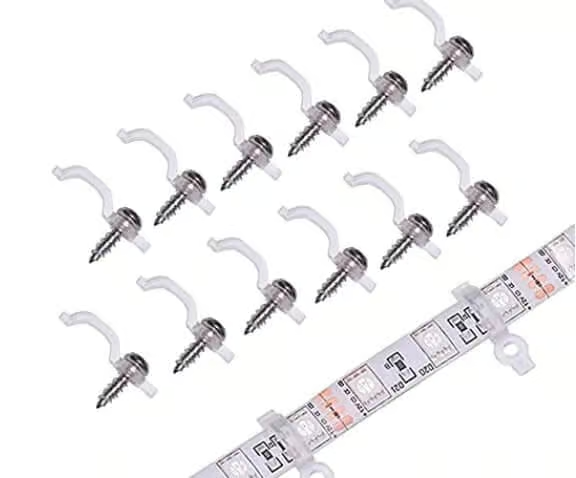
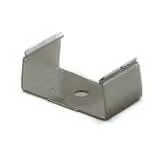
- One-side bracket fixing clip: When mounting LED strips using these clips, the bracket-shaped structure of the clips holds the strips, and the one-side screw is nailed to the surface. One-sided bracket clips are the most common clips used for LED strip mounting. Besides, they are also cheap and readily available.
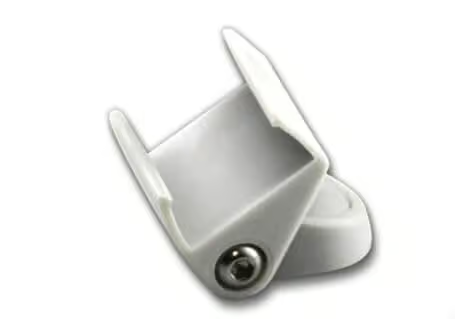
- Angle adjustable clips: Angle adjustable clips are a great option if you are willing to install a customizable LED strip. Using these clips, you can adjust the beam angle of your LED fixture.
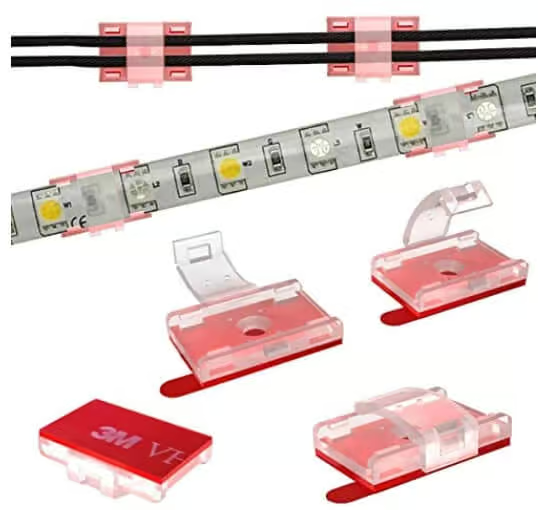
- Clips with adhesive backing: Clips with adhesive backing are excellent for LED strip mounting. The clips hold the strips to maintain their shape & the adhesive backing ensures the strips stick firmly to the surface. Using these clips, you will require no drilling or screwing.
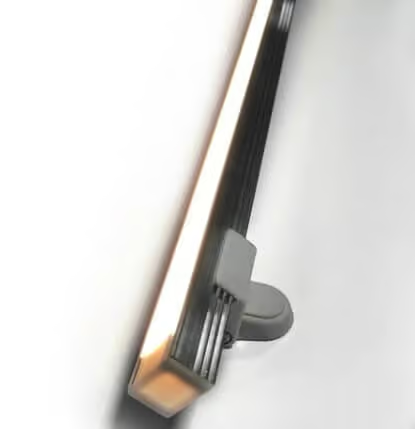
- E-Clips: E-clips are your best option if you are willing to install LED strips in aluminum profiles. They can be both metallic and plastic. These clips’ ‘E’ shape holds the strips straight to the surface to create a seamless lighting effect.
Besides these, other varieties of clips are available in the market. You can choose the one that you find best for your installation.
2. Pros and cons of clip mounting
There are both advantages and disadvantages to clip mounting techniques. These are as follows-
| Pros | Cons |
| Ensures proper securing of the stripsExcellent for outdoor installation Shaping the strip is more manageable by using clips Best option for permanent solutions | Requires drillingTime-consuming installation method |
C. Channel Mounting
Channel mounting is an excellent option for installing LED strips. These channels protect the LED strips from dust, dirt, and other unexpected substances. Thus, it makes the LED strips last longer. However, there are different types of channels for LED strip mounting; these are as follows:
1. Types of channel mounting
LED channels can be of plastic, aluminum, or steel. Among these materials, aluminum channels are the most popular for mounting LED strips as they are ultra-lightweight. Here are some of the common types of channels used for LED strip mounting-
- Standard aluminum channel: These are the most common channels used for LED strip mounting. They are basic in design, thick, fracture-proof, and affordable.
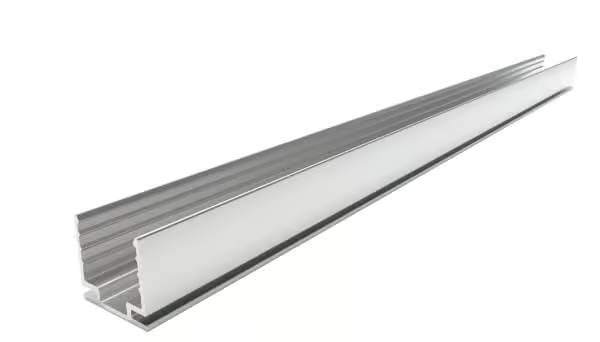
- Diffuser aluminum channel: This type of channel has a transparent covering on the top of the aluminum channel, which brings a diffused lighting effect. There are three types of diffusers- clear, frosted & opal. All these types provide different lighting illusions. However, they are available in different sizes & heights. The closer the diffuser is to the LED strips, the brighter and less diffused light you get. So, check the height of these channels before you get one.
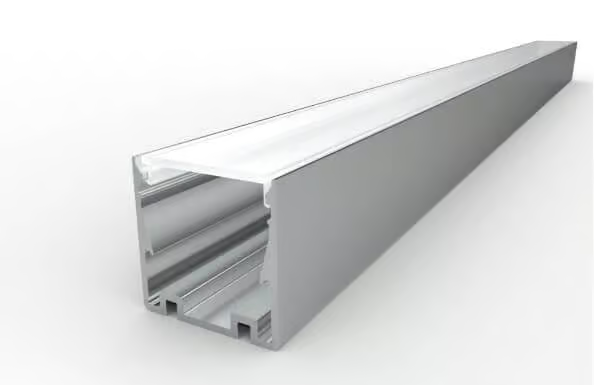
- Serrated aluminum channel: Serrated aluminum channels are your best option for installing ceiling-suspended LED strips. They have internal elastic racks to hold the strips tightly and protect them from possible friction or any damage due to falls.

- Bendable channel: These channels are an excellent option for ultimate flexibility. They can hold both vertical and horizontal bending strips.

Besides all these channels, there are other channels: flange aluminum profile, thickened plastic channel, 316 stainless steel channel, hybrid channel, etc. However, aluminum channels are better than plastic or steel channels as they are lightweight and corrosive-free. To get an overall idea about aluminum channels, check this- Ultimate Guide To Aluminum Profile For LED Strip.
2. Pros and cons of channel mounting
Channel mounting has many advantages, followed by a few drawbacks. These benefits and disadvantages of channel mounting are as follows:
| Pros | Cons |
| Protects LED strips from dust & dirtBest for submerged installationProvides a seamless lighting effectGives the flexible LED strips a proper shapeHides the LED strips, so it looks fine even when the lights are turned off | Expensive Time consuming installation process |
Factors to Consider When Choosing a Mounting Technique
There are different types of mounting techniques for installing LED strips. But which one should you follow? To choose the ideal technique, consider the factors below:
A. Surface material
You must consider the surface material when selecting the mounting technique for an LED strip. For example, you can use clipping and screwing techniques for installing LED strips in plaster or brick walls. This method is also excellent for a paper-printed wall. That is because such walls using adhesive damage walls’ design and texture.
But the adhesive technique is best for tiled surfaces as it doesn’t permanently damage the tiles. However, this technique requires a smooth surface. So, in case the surface is not smooth enough, switch to other methods.
B. Environment
Considering the environment where you install your LED strips is essential in choosing the ideal mounting technique. For instance, the channel technique is best if you are planning for outdoor installation. Here, the LED strips will remain protected by aluminum channels saving your strips from dust, rain, etc. However, the LED strips should also be waterproof for maximum protection.
C. Ease of installation
Clipping, screwing, and drilling may seem troublesome to many of you. So, if you are installing LED strips for the first time, use the easiest method to avoid complications. Considering these factors, the adhesive technique is the ultimate solution for you. It is the quick and easiest method of installing LED strips. Place a double-sided tape in the strips back and press it to the surface; it’s all you need to do!
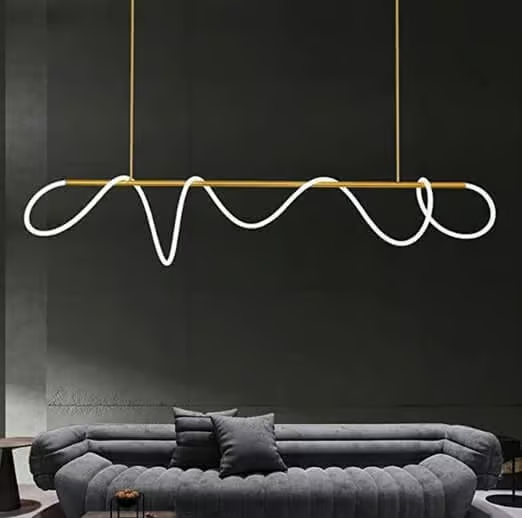
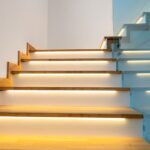
D. Aesthetics
You can be creative with your installation method to bring aesthetic lighting appearance. Channel mounting techniques can help you get a sophisticated look to your lighting. For example- suspend the LED strips from the ceiling and see how elegancy it adds to your interior.
Steps to Install LED Flex Strips Using Different Mounting Techniques
For LED strips, there are multiple mounting options available. The step-wise installation procedure of these techniques is as follows:
A. Adhesive Mounting Technique
Adhesive mounting is a way of installing LED lighting fixtures by using an adhesive to attach them to surfaces. The adhesives form a strong bond between the fixture and the surface. Using adhesive tapes, you can easily and quickly mount your LED strips following the below steps-
1. Surface preparation
Before installing the LED flex strip, prepare the surface to which it will be attached. The surface must be clean, dry, and free from dust, debris, or oils. Use a cleaning solution to clean the surface and allow it to dry completely. Doing so will ensure the adhesive sticks properly to the surface.
2. Applying adhesive
Once the surface is prepared, apply an adhesive to the back of the LED flex strip. Usually, the LED strips include an adhesive backing. All you need to do is, remove the covering tape of the adhesive and apply it to the surface. But if your LED strips don’t have an adhesive backing, use double-sided adhesive tape to the back. However, no worries with LEDYi; all our LED strips include adhesive backing. So, no need to take the extra hassle while installing our strips.
3. Installing LED flex strip
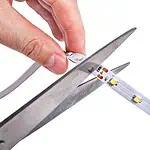
Once the adhesive has been applied, carefully align the LED flex strip with the surface. Then press it down firmly. This will ensure good contact between the strip and the surface. Depending on the application, you may need to cut the LED flex strip to the desired length using scissors or a knife. Once the strip is in place, connect the power supply and test the LED lights to ensure they are working correctly.
Thus, following these simple steps, you can easily install LED strips using adhesive mounting techniques.
B. Clips Mounting Techniques
LED Clips provide a secure and neat way to mount LED strip lights. These clips are easy to install and will hold the LED strip in place. It also allows you to customize your lighting setup. So, check the steps below to mount your LED strips using clips-
1. Prepare the base
Ensure the mounting surface is clean, dry, and free of debris or oil. Measure and note the location of the LED clips. Use a level to ensure that the mounting surface is level. If necessary, use a pencil or marker to mark the placement of screws or mounting hardware.
2. Installing clips
Choose the appropriate type of LED clip for your application. First, consider the size and shape of the LED strip, as well as the desired mounting position. Align the clips with the marks on the mounting surface. Use screws, adhesive tape, or other appropriate hardware to secure the clips to the mounting surface. Be sure to use hardware suitable for the LED strip’s weight and size.
3. Inserting LED flex strip into clips
Ensure the LED strip is clean and free of debris or oil. Align the LED strip with clips. Confirm that the contacts on the strip align with those on the clips. Press the LED strip into the clips, ensuring it is securely held. Now connect them to the power source, and your LED strips are set to glow.
C. Channel Mounting Technique
Channel Mounting protects the LED lights from dust & dirt. It provides a seamless lighting effect to your LED strips. Besides, using these channels, you can suspend the LED strips from ceilings, walls, and other surfaces. This provides a unique visual effect for both commercial and residential applications. So, follow the steps below to give aesthetic lighting to your space using channel mounting-
1. Measuring and cutting the channel
First, determine the length of the required LED strip, and size the channel as per the strips. Use a miter saw or any metal cutting blade to cut the channel.
2. Placing the flex strip in the channel
Take the LED strip and insert it inside the channels. First, remove the adhesive backing of the strip and press it to the surface of the channel. Here ensure the endings of the channels have the correct joining points for connecting the strips to the power source. Once the flex is properly fixed in the channel, close it with a diffuser. Here you can choose clear, frosted, or opal, whichever diffuser suits your taste. And with this, your channel is ready to mount on the surface.
3. Mounting the channel
You can use clips and screwing methods or double-sided tape to mount the channel to the surface. Clean the surface properly, and locate the place to install the channel. Now, drill walls and screw the channels to the surface. If you want to avoid taking drilling hassles, add double-sided tape to the back of the aluminum channel. Remove the tape covering and attach it to the surface/wall. Press it well to stick the channel finely. Now connect the power source, and it’s done!
Thus, following these simple steps, you can easily install LED strips using your preferred mounting techniques.
How To Create a Seamless Lighting Effect With Mounted LED Flex Strips?
Creating a seamless lighting effect requires careful measurement and planning. The first step is to determine the desired length of the flex strip. Determine the shape of the area being lit. Next, measuring the area you will cover with the flex strip is vital. Calculate how many strips will be needed. Once you have determined this, the strips can be cut to size using wire cutters or scissors. This depends on the type of strip being used. And use a ruler or measuring tape to ensure accuracy.
Once you have cut the strips to size, you must connect them to create a continuous light line. To do this, connectors are used to join each strip together. The connectors should match the type of strip used and be rated for outdoor use if necessary. After connecting the strips, you can mount them onto a surface using adhesive tape or mounting clips. You can also use other mounting techniques in your preference.
The last step is to connect all the strips to a power source and turn them on. Depending on the type of power supply used, this may require an adapter. Or it can be a dimmer switch to adjust your desired light levels. After you’ve completed these steps, you’ll be able to create a seamless lighting effect with mounted LED flex strips.
Importance of Proper Mounting Techniques For LED Strips
- Adequate knowledge of mounting techniques allows you to find the correct procedure to mount your LED strips. Thus, it ensures your LED strips stick firmly to the surface.
- Proper mounting techniques allow you to install the strips correctly in a systematic way. Thus it saves you time.
- Furthermore, mounting techniques using aluminum profiles can help protect the LED from environmental factors. This includes dust and moisture.
- Finally, a correct mounting technique can also improve the thermal efficiency of LEDs. That is because it allows adequate airflow to the fixtures for better heat dissipation. Ultimately, this leads to improved performance and longer lifetimes for LEDs.
Therefore, before installing your LED strip, know about different mounting techniques and choose the one you find best for your project.
FAQs
Last Words
Overall, installing LED flex strips is a relatively easy task requiring little knowledge or tools. With the right mounting technique, your LED strip installation can look professional and last a long time. Decide on the location and length of your LED strip installation. Use the appropriate mounting hardware and techniques to ensure that your lights are secure and look great. With these above tips, you can easily create beautiful Lighting in any space.
LEDYi manufactures high-quality LED strips and LED neon flex. All of our products go through high-tech laboratories to ensure the utmost quality. Besides, we offer customizable options on our LED strips and neon flex. So, for premium LED strip and LED neon flex, contact LEDYi ASAP!