Is your LED strip light facing flickering or brightness issues? Power injection will solve this, boosting the overall light performance!
Due to voltage drop, the brightness of the LED strip gradually decreases with the increase of length. Power injection is essential to solve this and ensure consistent brightness throughout the strip length. Here, you need to add an additional wire gauge to different points of the LED strip and connect it to the main power source to minimize the voltage drop. End-to-end, midpoint and parallel injection are the most popular LED strip power injection methods.
I will discuss all these three methods in detail, following which you can inject power into the LED strip without professional help. Apart from this, you will also find some tips and ways to avoid power injection. So, let’s begin-
What Is Power Injection In LED Strips?
Power injection is a technique used to boost the performance of LED strip lights. It refers to adding additional electrical power to specific points of the LED strip light to overcome the voltage drop. Thus, rather than supplying power from end to end, the LED strip light gets additional power from multiple points along its length. This enhances the brightness and overall light output of the LED strip. If your strip light loses brightness gradually as its length is extended, it needs power injection.

Why Do You Need To Inject Power Into LED Strips?
When you connect multiple LED strips together to extend the length, it causes a voltage drop. This happens due to the increase of resistance within the conductive material. As electricity passes through the LED strips, it faces resistance. This causes a voltage drop, dimming the LEDs. So, as the light runs within the strip, its brightness decreases gradually.
| Length Of The Strip Increases ⇑ Resistance ⇑ Voltage Drop |
Due to voltage drop, your LED strip may also face uneven color mixing if it’s an RGB variant. Such circumstances will cause the fixture to overheat, which can cause permanent damage to the LED chip. To avoid such a situation, you need to inject power to the points where voltage drop is faced. Thus, equal voltage will be distributed throughout the LED strip length, providing even lighting. To learn more about voltage drop, check this- What is LED strip voltage drop?
Benefits Of Injecting Power Into LED Strips
Injecting power into LED strips brings several benefits rather than just removing the voltage drop issues. Here is why you should initiate injecting power into your LED strips-
Improves Brightness And Consistency
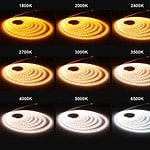
Power injection ensures equal voltage throughout the strip length. Thus, all the LED chips emit equal brightness, giving you constant illumination. Besides, the color accuracy will also be maintained in the fixture. This is very important when installing LED strips in areas where consistent lighting is essential. For instance, power injection will boost the performance of architectural lighting or backlighting for displays.
Extends The Lifespan Of The LEDs
The LED strip operates at low temperatures and has a heat sink that keeps it cool. But it gets overheated when your LED strip lacks power or faces a voltage drop. This is very harmful for the LED chips that remain arranged within the strip length. Overheating decreases the lifespan of the LED, discolors the chip, and can also damage it permanently. So, proper electricity flow is essential. This is why electricity will flow all around the strip by injecting power into the LED strip, preventing overheating. Thus, the LED chips in the strip light will remain safe and last longer.
Prevents Flickering or Strobing
Would you like it if your LED strip light flickered all day? This is surely irritating, causing a glaring effect. The LED strip will end up flickering when there is irregularity in voltage or current flow. To prevent this, you should inject power into the LED strip. This will reduce the voltage drop and solve the light flickering issues. Besides flickering, you might face other issues while operating the LED strip light. This guide will help you get rid of those troubleshooting LED strip problems.
Improved Controller Compatibility
LED strip lights that have color-changing features or provide dynamic effects need to be connected to the LED controller. Injecting power into the LED strip can provide better compatibility with the LED controller. This distributes power evenly, preventing overloading of the controller. Thus, you can access the advanced features of the LEd strip without facing any issues.
Extend The Length Of Strips Without Affecting Performance
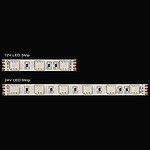
When extending the length of strips, you need to join multiple strips together. But at a specific voltage, the strips will give off optimal performance up to a certain length. After that, as you extend the length, the voltage drop increases, which impacts the light performance. For example, if you purchase a 12V LED strip light, you can extend it up to 5m. After this, you need to add or inject power to extend the length; otherwise, the strip will face voltage drop issues.
Again, the maximum length for a 24V LED strip is 10m. As you increase its length, you will have to inject power to maintain constant brightness. Thus, power injection keeps up the performance of the fixture without affecting the brightness. However, high-voltage LED strips are also available. They can extend to long lengths without frequent power injection. You can extend our LEDYi 48V Super Long LED Strip up to 60 meters without facing any voltage dripage. These fixtures are excellent for large installations needing no hassle of power injection. They run at constant current IC. So you will get the same brightness from the beginning to the end. Check this to learn more- What Are the Longest LED Strip Lights?
Method Of Injecting Power Into LED Strip – Stepwise Guide
You can inject power into the LED strip in several ways. Here are the most popular methods-
Method#1: End-to-End Injection
In end-to-end power injection of LED strip light, additional power is supplied to both ends of the fixture. This method is very simple and friendly for beginners. If you are working on moderate density and shorter strips like 5m long, end-to-end power injection is a good method. However, it might not be suitable for long strip runs with high LED density. Here is the process of injecting power in LED strips following the end-to-end technique-
Step 1: Prepare the LED strip ends
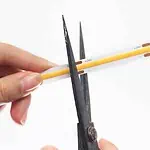
In the end-to-end injection method, you need to add additional power to the ending points of the LED strips. So, cut the LED strip to your required length for the installation. LED strips have cut marks on their body, which you can quickly cut using scissors. However, this guide can help you size the LED strip- How to Cut, Connect, and Power LED Strip Lights. Once you have the desired length of the LED strip, you need to strip about 5 mm of insulation from the copper pads at both ends of the strip.
Step 2: Cut Additional Wires & Strip Wire Ends
Cut additional wires to the required length for power injection. These wires will carry additional power from the power supply to the LED strip. Take a wire stripper and strip the insulation from the ends. Ensure you have enough exposed wires on both sides to build a secure connection.
Step 3: Connect Power Wires to LED Strip & Power Supply
Take the striped power wires and connect one side of the wires to one side of the LED strip and the other side to the power supply. Connect one end of the additional wires to the positive and negative terminals at the starting point of the LED strip. You should ensure the wires’ positive (+) and negative (-) terminals match that of the LED strip and power supply. Besides, the voltage of the power supply is also an important fact to consider.
Step 4: Secure Connections
Now, you need to secure the connections by soldering them. This will create a strong connection, eliminating the chances of loose wiring. Further, use heat shrink tubing to cover and insulate the soldered joints. This will add additional protection and help prevent shorts.
Step 5: Test the Setup
After securing the connection, test the LED strip to check if the power injection is successful. Switch On the LED strip and check for consistent brightness throughout its length.
Method#2: Midpoint Injection
Midpoint power injection is a suitable option for boosting the performance of medium-length LED strips with high LED density. As the length of the LED strip extends, it faces a voltage drop. As a result, the brightness of the light gradually decreases as the length increases. Midpoint injection acts as a central power station to solve this problem. This method adds external power in the middle of the strip. Here is the process to implement midpoint power injection-
Step 1: Cut The LED Strip In The Middle Point
Take the LED strip of your desired length and identify its middle point. Doing this, you will have two segments of LED strip. Now, use a striper to remove about 5 mm of insulation from the copper pads at both ends of each segment. These open pads are where you will connect additional wires to inject power.
Step 2: Tin The Copper Pads
Take a soldering iron and heat it. Next, apply a thin layer of solder to the exposed copper pads. Doing this will improve conductivity and create a smoother surface for better connections.
Step 3: Connect the First Segment to the Power Supply
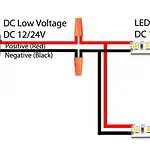
Look for the positive and negative wires of the power supply. Usually, the red one is positive, and the black one is negative. Take the first segment of the cut LED strip and solder the red wire to the positive copper pad of its endpoint. Similarly, the black wire was soldered to the negative copper pad on the same end. Now, secure the two connections with heat shrink tubing. Remember, the connection that we are working on right now is not the segment that will connect in the middle point.
Step 4: Inject Power at the Midpoint
You will need extra wire to inject power at the LED strip’s midpoint. Make sure the wire you use is of the right size and gauge for your LED strip. Now, strip both ends of the wire and solder one end to the positive terminal of the power supply. The other end of the wire is to be soldered to the positive copper pad in the middle of the first LED strip segment. Secure both the connections with heat shrink tubing. Follow this same procedure to connect the remaining negative wire from the power supply to the negative copper pad of the LED strip on the same side.
Step 5: Connect The Second Segment
After completing the above process, the other end of the additional wire will be added as leftover. Grab the excess red and black wires from the midpoint injection. Now, solder the red wire to the positive pad on one end of the second segment of the LED strip. Similarly, connect the black wire to the negative pad of the LED strip. Secure the connection with the heatsink tube. In this entire process, if you don’t want to take the hassle of soldering, use the LED strip connectors. They are quick and easy to use, making the injection much more convenient. Finally, power on the light and check the light uniformity to ensure proper power injection.
Method#3: Parallel Injection
Parallel injection refers to adding additional power to multiple points of the LED strip in parallel instead of using a single power source at the beginning of the circuit. If you face voltage-dropping issues with long-length LED strips, parallel injection is a suitable way to boost your LED strip’s performance. Here is the step-wise procedure of this method-
Step- 1: Mark Injecting Points On the LED Strip
In a parallel injection method, you need to input power in multiple points of the LED strip. First, identify or mark out the points where you want to inject power. The point should be selected after every few meters or as per the requirement to maintain constant brightness.
Step-2: Calculate Wire Gauge & Prepare Wires
To select the right wire for power injection, start by calculating the current requirements and potential voltage drop for your LED strip. Choosing the correct wire gauge is crucial to minimize voltage drop and ensure consistent performance.
You can simplify this process by using our Voltage Drop Calculator. This tool helps determine the optimal wire gauge based on your specific needs, saving time and ensuring accuracy.
Once you’ve chosen the suitable wire, cut it into multiple pieces for connection to each injection point of the LED strip. Ensure the lengths are sufficient to reach the power source, as the wires will be connected in parallel. Strip both ends of each wire to expose the insulation for secure connections to the LED strip.
Using the right wire and proper connections ensures your LED strip operates efficiently with uniform brightness across its length.
Step 3: Solder Wires to LED Strips
Identify the negative and positive points on the LED strip. The positive end of the LED strip is to be soldered with the positive cord of the wire gauge, which usually comes in red. Similarly, solder the LED strip’s negative point to the black cord of the wire gauge. Ensure proper soldering to make the connection secure. You can also use a heat shrink tube to make the connection robust. Following this, you need to connect one side of each wire to every injecting point of the LED strip.
Step 4: Connect the Other Ends to the Power Supply
The injecting wire’s other ends should be connected to the power supply. You need to do this task maintaining polarity that is positive point to positive and negative to negative. You should use a solder or strip connector to secure the connection. If you are using solder, also use heat shrink tubing to insulate and protect the soldered joints. Thus, all the wires from different sections of the LED strip will be connected to the power supply.
Step 5: Test the LED Strip
Power on the LED strip and verify that all sections light up evenly. If the lights don’t glow, make sure the connections are secured. The lighting of the LED strip will be even and uniform if the voltage drop is handled properly by power injection.
How Will You Understand Your LED Strip Needs Power Injection?
Does every LED strip installation require power injection? No, all types of LED strip mounting will not need power injection. There are some specific conditions when you must inject power into the LED strip to keep up its performance. Below, I’m listing out the facts to consider for LED strip power injection-
Length of the LED Strip
Every LED strip is designed for a specific length compatible with the voltage. For example, you can extend a 12V LED strip to a maximum of 5m. It will start dimming if you want to extend its length more than five meters. Because the 12V can’t support the long run as resistance increases. In such a situation, you must inject power into the LED strip.
Voltage Requirements
When extending the length of the LED strip, you will see the brightness of the LED chip will gradually decrease as the light runs. This happens due to voltage drop. The voltage and length of the LED strip are, however, interrelated. Increasing the length will require additional voltage to keep the brightness constant. Besides, the voltage of the power source is also important. If you have a 24V LED strip and the power supply is 12V, it will not give optimal performance. In this case, you will need to inject power.
Brightness Loss & Wrong Color
If you find the brightness of the LED strip is gradually decreasing, try injecting power into the LED strip. The LED chips begin to dim as they don’t receive sufficient power to illuminate. Besides, it can also result in wrong color mixing. So, in such a situation, power injection can solve the problem.
Flickering or Inconsistent Lighting
Light flickering is a good hint that your fixture requires power injection. This occurs due to voltage drop. Besides, if there is insufficient current flow, LED strips can flicker. However, before injecting power into the LED strip, you should check its quality. Flickering issues can also occur due to manufacturing defects of the strip.
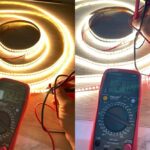
Calculating Voltage Drop
If you want a rock-solid answer to whether your LED strip needs power injection, calculate its voltage drop using a voltage drop calculator. However, online voltage drop tools are also available. You need to input the length of the LED strip, voltage, power draw, and some other information to calculate. This will show you whether the voltage drop is significant and will require power injection.
Consulting an Expert
Lastly, contact an expert if you can’t decide or fail to track if you really need to inject power into your LED strip. He will help you in injecting power into your LED strip. You can also ask for suggestions in choosing the right method for power injection.
Tips For Injecting Power Into LED Strips
In this section, I’ll be adding some tips to help you inject power into the LED strip successfully-
Plan Your Power Injection Points
Firstly, you must mark out the points where you need to inject power. This will depend on the voltage drop. You will need to consider the voltage of the power supply and the length of the LED strip to identify where the fixture is facing a voltage drop. For instance, if you have 12V LED strips, you should inject power at least every 5 meters. And as you extend the length, the power injecting interval will be minimized. For example, if the same 12V LED strip is extended to 10m, you better inject power every 3m to get the best light output.
Use the Correct Power Supplies
You should always be careful in choosing the right power supply for the LED strip. If your LED strip is 12V and the power supply provides 24V, this will overpower the LED strip. In this case, you will definitely need no power injection as the LED strip is already getting higher voltage. Initially, this additional voltage supply may brighten the light output, but eventually, it will overheat the LED chip and damage it. Therefore, always match the voltage of the LED strip to the power supply for optimal light output.
Double-Check Polarity
When injecting power into an LED strip light, you will need to be aware of the polarity. Power injection into the LED strip requires connecting an additional wire gauge to the LED strip and the power supply. In such connections, you must ensure the positive wire is connected to the positive end of the LED strip and power supply. Similarly, all the negative ends should be connected to the negative wires. If, in any case, the polarity is not maintained, the lights will not glow. To learn more about polarity, check this- What is the Polarity of LED lights?
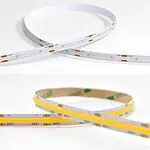
LED Strip Density
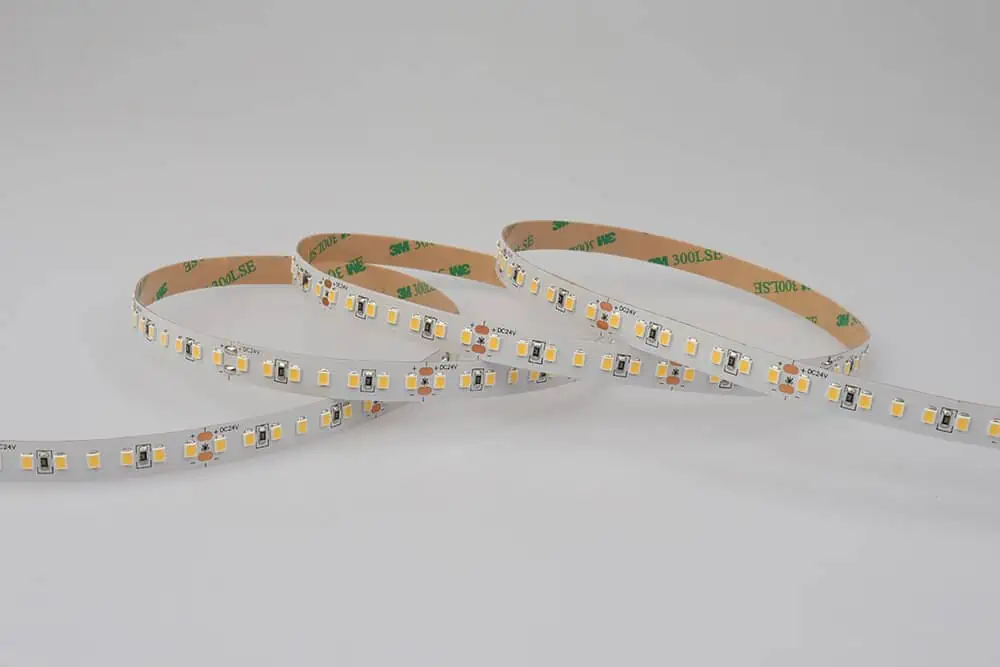
The voltage drop increases with the LED density. LED density means the number of LED chips per meter. Low-density LED strips have fewer chips than high-density LED strips. So when the electricity passes through the low-density strip, it faces less resistance than high-density ones. That is why the voltage drop in high-density LED strips is more. When you power inject these stripes, you will need to inject power at a closer distance compared to low-density strips. For example, if a low-density LED strip needs power injection after 5 meters, the same-length LED strip with high-density might require injection after every 3 meters. Therefore, take the density under consideration when injecting power to LED strips.

How Can You Avoid The Need For Power Injection Into LED Strip?
Injecting power to your LED strip needs additional wiring. If you are not used to working with fixtures, this may need professional assistance, adding additional cost. So, if you don’t want to take this hassle, here are the ways you can avoid injecting power into your LED strip lights-
Avoid Long With A Single Strip
When extending the LED strip length, it will face a voltage drop. This is the main reason you need to inject power into the LED strips. So, the best thing you can do to avoid power injection is to keep the strip length short. Shorter strips naturally experience less voltage loss. Therefore, go for multiple shorter strips rather than running a single long strip.
Choose High Voltage Strips
Another excellent way you can avoid the need for power injection is to use a high-voltage LED strip. These fixtures are ideal for continuous runs as they don’t go through voltage drop as length increases. In fact, these High Voltage LED Strips are available in longer lengths. You can get 50m in a single high-voltage LED strip reel. That is, there is no need to inject power for longer installations. However, high-voltage strips are not suitable for all types of installation. They are mostly used in commercial lighting. But when it comes to residential lighting, low-voltage LED strips running on 12V or 24V are more popular. Check this guide to pick the suitable voltage for your space. How do you choose the voltage of an LED strip? Is it 12V or 24V?
Use Thicker Wire
While installing the LED strip, you need wires to connect the fixture to the power supply. In this case, opt for a thicker wire gauge. Such wires reduce the resistance, allowing smoother current flow. Thus, the reduced voltage drop minimizes the need for power injection. Therefore, when installing long-run strips, you should use thicker wire than the minimum recommended size for your LED strip.
Use Multiple Power Supplies
You can use multiple power supplies instead of injecting power at various points. This will distribute the electricity equally across the length of the LED strip. Thus, every section of the LED strip will be powered by an individual source, reducing voltage drop. This way, you will not need to worry about power injection.
Invest in High-Quality LED Strips
Low-quality LED strips are made of poor conductive materials that cause higher resistance. As a result, these strips face a greater voltage drop. It is best to purchase LED strips from reputable manufacturers that produce high-quality components. Branded strips often use better conductive materials that result in reduced voltage drop. Check this article for the best LED strip manufacturer for your project- Top 10 LED Strip Light Manufacturers And Suppliers in WORLD (2024).

FAQs
The Bottom Line
To inject power into an LED strip, you will need to consider the voltage drop and LED strip length. Power injection means adding external wiring within the strip length connected directly to the power source. If you are working with short-length LED strips, the end-to-end method is ideal for power injection. But while working with longer strips, parallel injection on multiple points of the LED strip is good to go. You can also choose midpoint injection for moderate strip lengths.
However, when purchasing LED strips, you should always give preference to their quality. LEDYi is your ultimate solution for premium LED strip lights. All our products are made of high-quality conductive material that reduces resistance and voltage drop. Besides, you can also buy our high voltage or long run LED strip series to avoid power injection. Here, I suggest you pick our 48V super-long series that can run up to 60m without requiring any external power injection! So, order your preferred LED strip ASAP!