Before a few years ago, only experts knew about LED technology. Light emitting diodes were kind of a tech underdog when technology was at its most limited. But LED products have recently started to take a bigger share of the market for lighting. Even at the consumer level, it’s easy to find a lot of models. So much so that you can now buy an LED strip light almost anywhere. Of course, every model has at least one problem that needs to be fixed.
So, here are some common problems with LED strip lighting that you can fix. Follow the steps below to find your exact problem, each problem is explained briefly and has a simple solution.
My LEDs Are Flashing
If your LEDs flash in a pattern, your power source is being used up too quickly. This means too many lighting strips are connected to that power source. For example, a 10m LED strip that uses 5W per meter would require 50W. If all of those strips are powered by a 30W source, this will go into a safety mode called “overload protection.” In this mode, the device will turn on, figure out that it is complete, and turn off again. Then this cycle will start all over again.
You might buy a more significant power supply that can handle the total wattage needed, which is bigger than the total wattage of all your LED strips. You could also split the strips between two power sources the same size as you have now. On the other hand, your project might allow you to connect fewer strips to that power supply.
For more detail information, you can read How to Fix Flickering LED Strip.
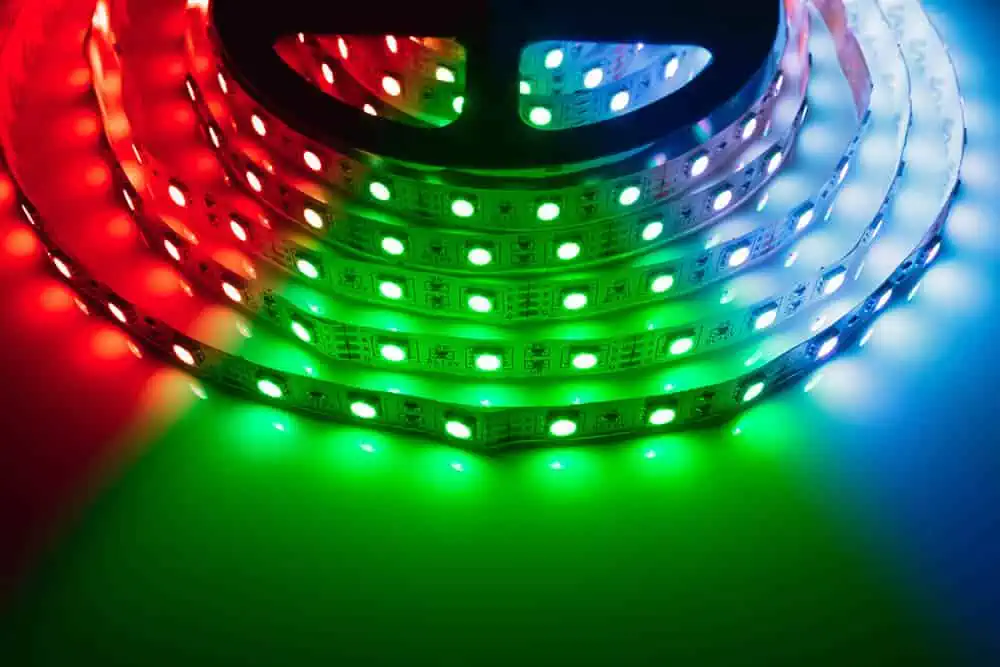
A Different Color Is Being Shown By My RGB/RGBW LEDs In a Few Small Areas Of The Strip
Do your LED strips usually work for most of their length but only in one or a few places near where they were cut? That means that the broken Red LEDs are in that part. This is easy to check because if you only set the strips to Red, that part will be completely dark, and if you only set them to Purple, that part will only show Blue.
It can be very confusing when you set up your first LED project and see that the colors don’t go together. But the simple answer is that one of the RGB/W LEDs in that area is broken and needs to be replaced. This can be caused by static electricity, too much bending and twisting, stepped on, damage during shipping, using a cheap, low-quality strip, or dry solder joints.
Each segment of a flexible LED strip, which may be manufactured in a range of lengths, is hardwired to create its own independent, self-contained circuit (In other words, just the portion of the strip that is contained inside the cut points will be affected if an LED or resistor is damaged.).
This problem is probably caused by a dry solder joint and shows up when the whole part between the cut points doesn’t work. It is a lot like that, a broken LED or resistor.
Most of the time, the only choice is to replace that part of the strip. To do this, the whole strip can be switched. You can buy a different part and solder it or use connector clips to add a new 100mm section. Before you do this, try touching or pressing down on the LEDs or resistors in the damaged area. In the best case, the light turns back on by itself. In this case, a dry solder joint is an issue you can fix if you know how to solder.
My RGBW And RGB LEDs Are Displayed In Different Colors
If all of the LED strip colors work except for one, and that one color doesn’t work anywhere along the strip (for example, all of the red LEDs don’t work), Consequently, there is a problem with the Red -ve cable’s soldering to the strip’s PCB, the Red cable connecting the strip to the receiver, or the Red cable’s connection to the receiver. A Red LED cannot be broken over its entire length. Thus we may conclude this with some degree of assurance. Instead, a bad LED will only affect the area between the cut points because of how LED strips are made. So, the problem is with the wiring.
Ensure the cables between the controller and the strip work, primarily if you use a connector block to keep the wires longer. For a good test, you must get rid of all extension cables and control equipment and connect the power supply directly to the strip. Also, remember that black is always positive (+) on RGB/RGBW strips. So, first connect the power source’s positive wire to the LED strip’s black wire. Then connect the -ve from the power supply to the cable for the color that isn’t working.
Let’s say that the problem is with the blue cable. The blue lights should then turn on to show that they are working, which means you have a weak connection somewhere else. Using this information, slowly put the system back together, including the controller and any extension cables, and see which part stops the Blue lights from working.
My LEDs Are So Hot They Are Nearly Burning To Touch
There could be two possible reasons why this is happening. Either your 12V LED strips are connected to a 24V power supply, another possibility is that there is a “short” along the strip, which means that the solder has crossed the PCB and the +ve and -ve are touching, making the circuit short. Also, If you have an output cable, the output positive and negative terminals may touch one another.
If the problem is caused by putting 24 volts on a 12-volt strip, the strips will still work. Since you’re sending more than twice as much power, they will look brighter than they should. But the problem is that doing so can increase the chance of a fire and cause the LEDs to get very damaged (often within hours). If true, the strips will break within a few hours, and the LEDs will be damaged if the positive and negative ends touch somewhere. Even the smell of something burning could be dangerous.
If a 24V power supply is powering 12V strips, you will need to get a 12V power supply or find a converter that lowers 24V to 12V. (In this case, the wiring would go between the power supply and the strip).
Whether you think or not there is a “short,” you need to look closely at each piece of the strip to see if any solder is crossing the connections. If so, you can use a knife to cut the solder so that the positive and negative ends don’t touch anymore, or you can resolder it.
My LED Strips Are Tripping My Breaker
There could be two reasons for this. Your power supply might not be working. If not, your breaker won’t be able to handle the considerable amount of current all at once.
If you think one of the power supplies is broken, disconnect them from the breaker and try to reconnect them one at a time, adding another each time until the breaker trips. Then you’ll know which one is wrong. If a breaker trips even though there are many power sources connected and none are broken, That circuit breaker can’t handle the input current. There will be a need to make the breakers bigger. If it keeps going off, try putting the power sources on different breakers.
My LEDs Brightness Decrease Toward The End
Your LEDs are less bright towards the end because there is a drop in voltage across the strip.
Most common LED strips can be powered from one end and can be used up to 5 meters long without voltage drops that can be seen. (Some specialty strips are 10m, 15m, or 20m long.)
So, If you put two 5 m strips together and powered them from one end, the light would get dimmer as you got closer to the end. You should either: (A) split the strip up and connect the two 5 m strips in parallel or (B) install a ring main with a starter lead and an exit lead on the 10 m, and connect both cables back to the same power source.
My LEDs Smell Like They’re Burning – When Left Coiled Up
If you turn on the LED strips and leave them on the reel or still wound up, the heat will cause them to get very hot and burn out.
Only test the strips when they aren’t wound up. They can’t be coiled in any way.
My Strips Are Showing Inconsistent Colors In Patches
If you have a cold white strip and then see warm white in random areas of, say, 50mm (or they look “wrong”), this is because the warm white was painted on. This often happens when painters come in to paint and don’t know there are LED strips in the room because they are hidden.
The strips can sometimes be saved depending on how much paint there is. You can wipe off the paint on the strips. Only use products that don’t contain water to keep the LEDs from getting damaged. A fine knife can also peel the dried paint off the LEDs. Make sure the strips are turned off.
My LEDs Do Not Light Up At All
If the LEDs don’t light up, it could be because the power supply is broken.
Try connecting a different power source into the same strip if you have more than one to check if it now functions. If it does, your power supply is broken, and you need a new one.
My RGB/W LEDs Are Only Lighting Up A Low (RED) Glow
24V LED strips are hooked up to a 12V power source.
The only option in this situation is to buy another 24v power source for your 24v strips.
When I Select Colors For My RGB/RGBW Strip, They Are All Wrong
You have crossed over the wires on the controller. If you connect the Red cable to the Blue terminal and the Blue cable to the Red terminal, for example, when you choose a color on your controller, the colors won’t be mixed right, and you’ll see different light colors than the ones you chose.
The cables need to be checked, and any crossed over the need to be rewired to go to the right places. You could also check the connections if you used a cable connector to make the cord longer. When the cables sometimes touch, it’s hard to tell what will happen. If, for example, Red and Blue are touching, you must separate the wires to ensure the connections are clear and free of noise.
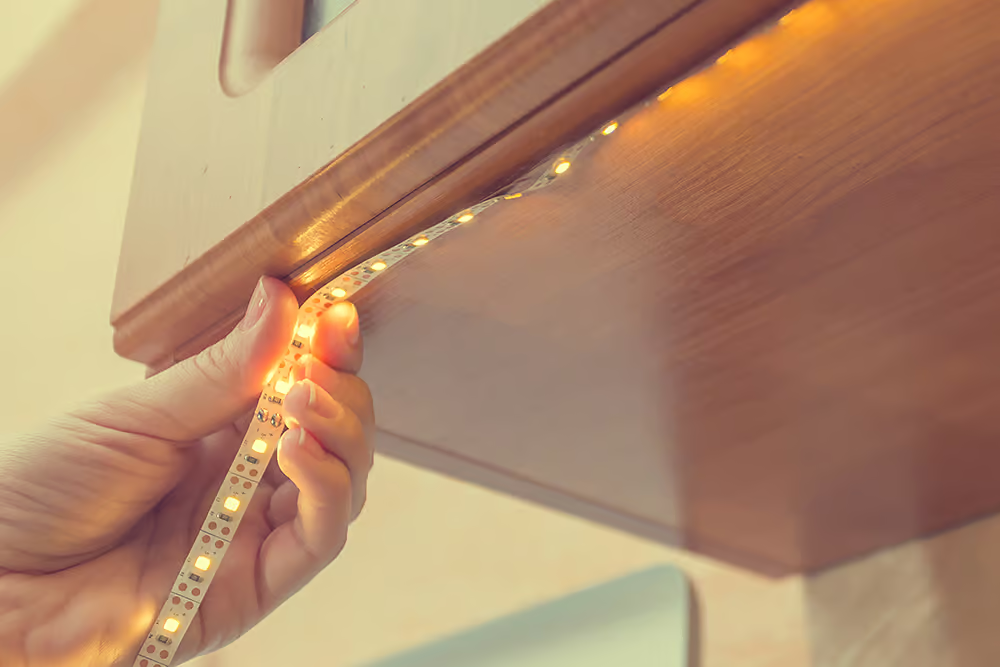
LED Strip Adhesive Is Losing Adhesion
The LED strips are easy to put up in almost every situation. The most important things about this kind of lighting are that it is flexible and sticks well. But what do you do if the glue doesn’t work?
This problem could happen to beginners who take the lid off too soon. Choose where you want the strip to go before you remove the cover that keeps the adhesive from drying out. More importantly, ensure the area is clean before putting it there. There shouldn’t be any dust or powder where you put the LED strip. A screw is often used to fix light strips that won’t stick anymore. Just make sure that the screw is behind the string of LEDs. The main goal is to clamp it without damaging it or putting too much pressure on it.
More information, you can read How to Choose The Right Adhesive Tapes For LED Strip.
Parts Of The LED Strip Do Not Light Up
A possible “open circuit” exists in one of the sections if a segment of an illuminated LED strip has a piece with only 3 LEDs (or 6 LEDs for 24V) that does not light up.
This means that a single LED or part for a single section has come loose because of a manufacturing flaw or mechanical damage during shipping or installation. This has cut off the power to all of the LEDs in that section.
If you have soldering skills, consider warming the solder joints for each LED and other components along that non-functioning segment. If not, the best thing to do would be to ask your supplier for a replacement (if they have a warranty) or just cut along the cut lines to remove the broken part and then use connector clips to put the two pieces back together.
LED Strip Showing The Wrong Color
Even though you put in your strip light, you see a color change. Or maybe the wrong color shows up all at once. You try to figure out what’s happening but can’t figure out why things have changed. First, the color you see comes from how brightly the photons shine. That is the result of many different parts. In reality, each manufacturer uses other raw materials to make the different colors of LED strip lights.
LEDs that come in different colors make light in a new way. RGB stands for the words “Red, Green, and Blue.” This color model is what makes the many bright pairs. If the wrong color is present, one of the three primary colors is not turned on. Most likely, a resistor was bent so much that it no longer worked.
Here is a solution to this problem that has to do with technology. First, look for the LED diodes with three primary colors that aren’t working. If you find a broken resistor, you can either try to fix it yourself or call customer service. This shouldn’t be a problem with flexible strip lights. If you can’t find a broken resistor, look for the four wires that control the three primary colors. The fourth shows how much voltage there is. It could be that the wires were switched during the making process. You can fix it by changing the wires.
LED Light Strip Won’t Turn On
When you just unplugged the strip light, was it still on? You might have put it back on, but nothing happened.
Sometimes, you might be in a hurry. But strip lights that aren’t very good aren’t worth your time. Before throwing away your LEDs, check if the power supply works. Most of the time, the power source doesn’t work or breaks down. If unsure, take your power source to a shop that fixes electronics for a quick test. It only takes a few seconds to test.
If your product uses batteries, try putting in new ones. This also applies to your remote control. If something goes wrong, check the cables. Bad connections between the wires can make your strip light up wrong.
The LED Light Strip Can’t Fully Shut Down Or Won’t Turn Off
The LED strip stays on even when the switch is turned off. You quickly tried different things to figure out what was causing the irregular luminescence. But you don’t have any more ways to figure out what’s wrong. If you use the remote to turn it off, sometimes only one color stays on.
LED power supply circuits can be easy to figure out. They change very quickly. Also, their technology works with technology that uses silicon-integrated circuits. LEDs, on the other hand, also need a steady current. So, the electronic switch system has a job to do. To solve this issue, you may need to install new switches compatible with LEDs, such as Z-wave.
It could be a problem with induced voltage. Move your light strip to a different spot and do some tests to figure out what’s wrong. There may be interferences that are causing the light to be dim. Usually, this can be solved by simply replacing the switches. If it is not enough, then you can get in touch with customer service.
The LED Strip Only Emits Either Red, Green, Or Blue Light
The red and blue lights stop working all of a sudden. Only the green diode is on. Even though it seems counterintuitive, there is only one viable color option. To achieve this parallel configuration, the LEDs are wired together. If one LED chip goes bad, it won’t affect the others.
First, you should do a small test. In other words, use the RGB controller to make the strip blue, red, or green. You may find that the strip works well. In this case, you should reset the LED light strip. Otherwise, keep going. After the test, turn on the strip light to check for broken resistors. You should be able to see damage on the breadboard caused by too much twisting or bending. If so, the resistor needs to be fixed.
The diodes may have finally reached the temperature that marks the end of their cycle. They could have also just died. Then you would have to use a different light strip. The size of the LED chips, on the other hand, makes it almost impossible to fix. They are too small for regular tools to fix. Also, fixing the problem would take time and work.
LED Light Strip Remote Not Working
Everything was put together and tested at home. At first, everything seemed to work perfectly. The strip was then taken to someone else’s house or workplace. There was nothing that happened, and the remote no longer works. Aside from that, the colors no longer change. Or you can’t turn it off when you want to. In other words, the remote doesn’t work no matter what button you press.
You could switch up how you use the remote as a first step. Sometimes it’s easy to forget where or how far something is. Try moving the sensor to get rid of this minor annoyance. You might need to reset the remote if the problem isn’t dead batteries. Then you have to put it back together with the strip light.
A good connection should also be made between the receiver unit, the power source, and the LED strip. Rarely do remote controls stop working. On the other hand, cheap universal remote control dimmers might stop working. If so, look for remote control models compatible with your brand, especially if it is still covered by warranty. Lastly, take some steps when you move the LED strip to a new place. Use padding or a container that can handle the heat.
LED Light Strip Connector Not Working
There are times when you need a specific connector. For example, the shape of the LS-12 connector is meant to make it easier to turn. Or a stiff LS-13 connector for angles of 90 degrees.
People have the most trouble with the first connection. Simply put, your LED light strip will have points that can be cut. When you do, this is where the connection happens.
If you open up the connector, you can see the two connections. After that, put the strip into the connector. More importantly, don’t use it forcefully. Just put the strip into each side’s connector.
Most likely, you did not get the polarity of the connector right. Your comic strip does have both good and bad parts. A click when closing the connector will confirm that everything is in its proper location. If the lids don’t stay shut, go back and carefully put the strip back on.
After all this, you are ready to light your strip for a test. As you might expect, there are different connectors for RGB, RGB W, plain color, and white strips that can be changed. In the end, the fact that they look different doesn’t matter. Simply attach the strip’s right end to the connector’s copper portion to solve any issues. If you make good contact, the strip will work.
LED Light Strip Stuck On One Color
A problem with a color that is stuck could happen at any time. You might have been doing your chores and then going straight home.
At the moment, the LED strip only shows one color. You did everything possible, but nothing seemed to solve the problem. You should never press hard on the LEDs on the strip. At their core, all LED strips are made the same way. So, you shouldn’t try to move the diodes back where they belong. That is not what started the problem. Most likely, the controller is stuck. More specifically, the settings for the driver are no longer working right.
Let’s talk about how to fix this instead of the many things that could have caused it. Your strip light is easy to fix if it has a fast reset. If your LED strip did not come with instructions, this is the usual way to fix it. Start by connecting everything as expected. After that, plug in the power adapter. After about five or six seconds, unplug it. The strip light will go out. Repeat this cycle until the strip light goes back to the factory setting. Most of the time, you need between five and ten cycles. Before you plug in the power supply, let it run for a few seconds.
At The End Of The Strip, The Color Of The Light Is Different
On one of the LED strips, some of the LEDs start very dim and go out at the end. The color of the light also varies a lot. This may be due to absorption. All you have to do to fix this is move it. You could also use a different light strip to make a quick diagnostic test. Switch them and see if both of them have the same problem.
If the second LED light works fine, it’s possible that the first one was broken somehow. For example, an LED strip should never be bent by less than one degree. Even better, in a straight line. On the other hand, a similar result gives you more information, specifically that the strip might need more power.
You could also try a different method to fix the voltage drop. Use more than one LED driver instead of just one. While you’re there, check for crossed wires, which could be the problem. Sometimes, wires that should never touch are stacked on top of each other.
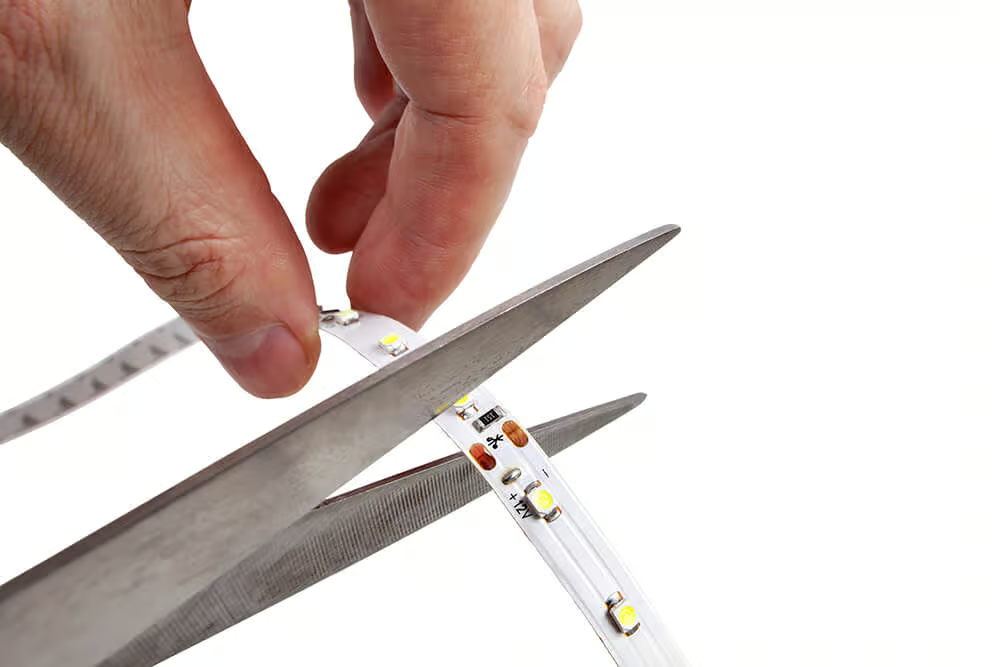
Problems Related To Cutting LED Strip Lights
The LED strip might need to be cut. But you can’t find the mark that was pointed out. LED light strips are easy to cut and don’t lose any usefulness when cut.
All you need is the following:
- A good pair of scissors
- A ruler or tape measure
- A soldering iron
Each set of cutting marks on most strips is about two inches apart (5 cm). You must unroll if the printer missed a place to cut the strip. There can be mistakes in printing. If a strip of material was improperly cut, you could not do anything to restore it. You need to find a single mark for cutting. The ruler can then be used to measure the following points. Of course, you want to go as far as you can. Then, the first section can be left out to make a test.
Also, making a precise cut takes a lot of accuracies. For the best results, ask for help from the person holding the strip in place. Once everything is done, solder the connections. After a brief test, place the strips where you need them.
The LED Strip Only Lights Up When I Touch It
You might have more than one strip of LED lights. When you accidentally touch one of these, it will sometimes light up. Some of your strips act the same way every time, but others don’t. So, this is what it means. Most LED strips respond to things that cause problems on the network. WiFi, a photovoltaic inverter, or a cheap impulse power supply are all examples. Experts call it “capacitive coupling.” In essence, it is a transfer, which may or may not be what you want. We can discuss parasitic capacitive coupling in this situation.
Take your light strip as a first step in figuring out what’s wrong. You can also find the cause of the disturbance and get rid of it. Even better, replace your power adapter with an EMC-certified power supply for your systems. That is better than a standard power noise suppressor filter.
LED Strip Lights Buzzing Noise Issue
You put two LED strips and their power supplies together a few weeks ago. The process went without a hitch. They do, in fact, do a perfect job. All of the links work perfectly. When you turn them on, they give off a beautiful light. After that, you wake up one morning. One of the two power supplies immediately starts to hiss, buzz, and make noise. When you turn on the light, it makes sense that silence comes back. What’s going on?
Power supplies only last so long. Even more often, problems are already present in some products when they leave the factory. Because of this, most people are told to choose products with a guarantee. Most power adapters make some kind of buzzing sound. Maybe all that needs to be done is to find a better place for the power source. Also, ensure it’s not sitting on anything that will worsen the vibrations. You might already know that a cheap adapter can get too hot. If that’s the case, you’ll find out at some point. That is to say. It won’t work as well as it once did and eventually won’t work at all.
Also, when you change colors, you might hear a buzzing sound. Even if it is not very loud, it can still be annoying. That sounds very sharp and sharp-edged. Finding the noise source is the first step in resolving the issue. Then, a stiff glass case can be used to muffle the high-pitched sound. You should return the item if there is no way to fix this.
More information, you can read Why Do LED Bulbs Buzz When Dimmed?
Flickering Strip Lights
You finally finished decorating your room by adding the latest RGB light strips. You decide to have a party online through social media. So you start to record a video. You notice a noticeable flickering in your stream all of a sudden. The same rules apply to how LED strip lighting works as to how LED lights do. In more detail, the visual flicker is caused by how waves tend to move. More specifically, the patterns of light waves from sources that use AC power.
You can see a flash sometimes. In this case, there is another problem. The kind of flicker that is usually caught on camera.No matter what, we can see that the lighting changes. Over time, it tends to shake or flash.
There are two ways to do this.
If you can see any flickering with your own eyes, you should check for damage or a leak. Most of the time, the problem could be caused by some moisture. The strip can sometimes be saved. But drying alone usually won’t be enough.
In the second case, flickering can be fixed with just a few simple steps. The quickest fix is to use a portable battery. By getting rid of the cause, you can fix the problem. This is what the alternating current is (AC). In reality, batteries are powered by direct current (DC). For a long-lasting solution, buy LED strip lights that don’t flicker.
More information, you can read Why do LED Lights Flicker on Video?
LED Strip Is Not Bright
You could see how bright the LED strip was in the store. But when you got it home, it didn’t shine as much. You tried to fix the problem by moving the power source or the location. But you still don’t understand what’s going on. And even more so since it worked fine when you returned to the store. If the light strip worked fine in the store, it might be because of a bad power source. In other words, some models require a specific voltage—for example, 12 or 24 Volts. But the wrong model will either get too hot or only give off a dim light.
If you don’t read the specs carefully, you might get an LED strip that doesn’t light up very well. It may last less long and be more likely to get too hot. Don’t use glue or acrylic cement to stick the led strip together. The ingredients in the glue could get on the LED and cause it to break down quickly.
Lastly, your LED strip may have been bent too far. Look for cracks in the strip if you see faint red, green, or blue colors. Also, the solder connections may change shape with too much heat. Because of this, the LEDs can’t light up right. Even with the right tools, it can be hard to make these repairs. Even impossible at times.
Dim At One End
Most of the time, this problem comes up with longer strips. You probably can’t figure out why the other strips you cut work fine, but the long one has this problem. Resistance gets to the heart of your “why.” In particular, a voltage drop is caused by the resistance of the metals.
The current flows through the strip because your power supply lets it. The strip keeps running into problems the whole time. In other words, as the strip gets longer, the resistance goes up. The strip won’t light up if the electricity can’t get to the other end. That is what started the problem. So, what should be done? Your LED strip needs more power.
You can use shorter LED strips for your project or reattach the strip every 20 to 30 feet (6-9 meters). To cut down on voltage drops, you can also use a wire with a thicker gauge.
Dim Over Time
Your LED lights have been there for a long time. They did a good job. But recently, they started to dim. The light has lost some brightness, so you want to make it brighter. There is no way for an LED to be bright and last long. A multicolored LED light strip can work for a few hours or a long time. Its use has some effect on how well light is spread. That is, how bright your LED lights are.
When it comes to LEDs, age is important. Different LEDs also use other technologies and change how they work over time. Over time, engineers have come up with new ways to mass-assemble and make LED devices. These, too, are made up of LED strips. Higher voltage can also cut short the life of LEDs. Diodes only do one thing. They light up before they go out. For the same reasons, your electrical system could also be to blame.
Check to see if the voltage in your circuits is still at the right level. A multimeter can measure how much the voltage in your system has dropped. After that, you can find the best way to look into the problem. Before replacing the old LED strips, try to rule out these possible causes. If you have problems with your electric system, it might be best to hire a pro. They do have more tools to deal with the problem faster and better.
More information, you can read How Long Do LED Strip Lights Last?
A Portion Of The LED Strip Does Not Light Up
Only one part of your LED strip lights up, and only half of it works. More importantly, this problem could affect a large part of the whole strip in one or more places. This problem could get worse if you put the strip into metal support. A typical aluminum profile, to give you an example. Here’s a way to fix it, so you don’t have to replace the whole light strip.
First, you should use a marker to mark the LEDs that are no longer working. The next step is to remove the strip’s power source. It is possible to repair the broken section by cutting it with a sharp box cutter. Remove the severed section next. You’ll be switching it out for a new strip of the exact dimensions. It must first be placed in the same spot as the previous one.
As you can see, there are plus and minus signs on the cutting spots. Just keep going the same way and at the same speed. Finally, use solder wire to join the edges together.
The LED Lights Won’t Flash Or Chase
Even if you connect the strip light to power and WiFi, you still can’t control how it works. Some LED strips don’t seem to work as well as they are promoted. Modern LED light strips typically have their app or program to control them. They sometimes work with specific operating systems or apps that work on all systems. So, it might take a lot of work to figure out how to fix the whole problem step by step.
There are, in theory, two main reasons why a chasing LED strip light won’t flash or chase. The first is using a dimmer. The second factor, meanwhile, has to do with the software. If you are using a dimmer, take it out. The issue will disappear after you disconnect it from the power strip. These features do not work with dimmers. If you don’t use a dimmer, you have to connect the strip to the WiFi again. You must use the app or an online program to find the network. The LEDs must then be linked to your phone to work together. After doing this, you might need to recheck the settings. You will find that the settings don’t usually show any pairing. So, you must either start over or ask for help.
Overheating Issue — The LED Strip Is Too Hot To Touch
When you turn it on, the LED lights are very bright. You can feel it warmer if you put your hand over the strip. The LED strip gets hot in the end. So hot that you can’t touch it. No one should ever let their LEDs get too hot. Too much heat means that the diodes are working too hard because there is too much electricity.
To put it another way, if you use too much power or voltage, your LED strip won’t last as long. Without testing, you probably won’t be able to figure out what’s wrong. It is best to test to see if there are any problems with the electrical system. If you want to figure out why your LEDs are getting too hot, here is a way to do it. Use a metal profile to get rid of heat. A simple aluminum profile will do. The metal will soak up the heat and make the LED strip cooler.
LED Lights Up And Then Turns Off
Another common problem is that these LED light strips suddenly turn on and off. This could be because of the dimmer you put in to change the brightness. These light strips can’t be used with many of the cheap dimmers.
This problem can be fixed by replacing the dimmer in the outlet. Before you do that, read the manual to find out what kind of dimmer will work best with your light strips. If the problem keeps happening, your light tips are likely broken. So, you should get a new set.
More information, you can read How to Dim LED Strip Lights.
The Entire LED Strip Light Does Not Light Up
- Ensure the LED strip’s voltage and the LED power supply’s voltage are the same.
- Ensure that the (+ve) and (-ve) poles of the LED strip are connected correctly.
- If all of the above steps have been taken and the led strip is still not working, it may be broken.
A Certain Section Or Several Sections Of The LED Strip Does Not Light Up
- Check if there are any problems with the solder joints between the FPCB and the resistors or LEDs.
- The LED lamp’s internal circuit could be broken. Inside the LED, the chips and brackets are connected by gold wires. If the gold wire isn’t connected, the current won’t flow, and the LED won’t light up.
In The Same Section, Only One LED Is Off, And The Other LEDs Are On
- The chip might have been burned out (you can observe whether there are black spots on the surface of the LED lamp). Possible causes include an electrostatic breakdown, an unstable LED power supply, a high inrush current, or a lack of resistance in some LED bulbs.
- Problems with the circuitry inside the PCB cause it.
LED Strips With The Same Color Temperature From Different Factories May Have Different Luminous Colors
- Different manufacturers have different tolerances for color temperature.
- Even if the CCT is the same, but the DUV is different, the color will look different.
For more information, please check https://www.ledyilighting.com/wp-content/uploads/2022/12/led-color-characteristics-factsheet.pdf
The Warm White LED Strip Looks Greenish
Even though the color temperature of 2700K–3000K LED lamp beads is bright white, the DUV value is positive, and the value is too high. The value shows how it differs too much from the black body curve above the curve.
For more information, please check https://en.wikipedia.org/wiki/Planckian_locus.
When The RGB Light Strip Is Mixed With White Color, The End Is Reddish.
The main cause of this is voltage loss. Because the RGB lamp bead is made up of red, green, and blue chips, the red chip needs less power to light up. Because of the voltage drop, the voltage at the end of the LED strip will go down. Because there needs to be more voltage, the green and blue chips aren’t as bright, but the red chip can be as bright as usual, making the end of the LED strip look red.
- 3.0-3.2V Chip for blue LEDs
- 3.0-3.2V Chip for green LEDs
- 2.0–2.2V Chip for Red LEDs
The LED Strip Is Falling Down
LED strip lighting is a type of lighting that is often used to decorate a home. They can be used to provide general illumination or to highlight certain areas of a room, and they’re simple to set up. LED strip lights can sometimes fall apart, especially if not installed correctly. The falling LED strip lights can be annoying and dangerous because they can break or cause electrical problems.
For more information, please check https://www.ledyilighting.com/how-to-stop-my-led-strip-lights-from-falling-down/.
A Specific Color Of The RGB/RGBW LED Strip Is Off
The circuit for this color is open. The chip inside the lamp bead that is this color may have a broken gold wire. A bad solder joint could also cause the open circuit in this color circuit.
The End Portion Of The SPI Addressable LED Strip Is Not Lit
Please ensure that the SPI controller can handle more pixels than the SPI LED strip. And make sure the controller is setting at the suitable pixel.
For more information, please check https://www.ledyilighting.com/the-ultimate-guide-to-addressable-led-strip/.
The LED Strip Cannot Be Dimmed
There are two types of LED strips on the market today: constant current LED strips and constant voltage LED strips. For constant recent LED strips, you need a dimming power source that sends PWM signals.
For more information, please check https://www.ledyilighting.com/super-long-constant-current-led-strip/.
FAQs
Conclusion
I believe that after reading this article, you have already understood the common problems of LED strips. If you have any questions or ideas, please leave a comment below, thanks.
LEDYi manufactures high-quality LED strips and LED neon flex. All of our products go through high-tech laboratories to ensure the utmost quality. Besides, we offer customizable options on our LED strips and neon flex. So, for premium LED strip and LED neon flex, contact LEDYi ASAP!