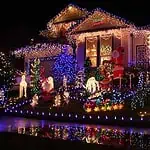
LED stripes with a smart LED controller can take your interior and exterior lighting to the next level. It is excellent for playing with light colorings. In addition, they give you a wide range of experimenting options with the entire outlook of your room.
LED Controllers are devices that support the light-controlling facilities of an LED stripe. Different types of LED stripes require specific variants of LED controllers to dim or change the light settings. So, all controllers are not suited for every LED strip. Therefore, before purchasing a LED controller, it is essential to know its types, uses and connection procedures, etc.
However, this article will give you a detailed idea about LED controllers, their categories, ways to face troubleshooting, and more. So, let’s get started-
What Is an LED Controller?
As soon as you get an LED strip light, you can’t wait to go home and customize it to your taste. And for that, an LED controller is a must-buy if you want to create different lighting effects with your LED strips.
You might now be wondering what an LED controller is. It is a unique chip-processing light controller that acts as a switch to the LED strips. And this device lets you control the lights’ intensity, color, and lighting patterns.
The best feature of an LED controller is that it enables wireless or Bluetooth control of the lighting. Plus, it allows you to dim the light, switch it on or off, and change or adapt the light color. Therefore, the LED controller is essential for operating and experimenting with multi-color LED strips.
What Does an LED Controller Do?
LED controllers mix colors and provide variants of hues on LED strips. Thus, they allow you to control the light colorings. For example, a LED controller can make purple lighting by mixing the red and blue colors of RGB strips in appropriate proportion to make purple. Again, you can get yellow lighting as the LED controller combines red and green. Similarly, it is possible to get many other lighting colors using an RGB LED strip with a LED controller.
Besides, in dim-to-warm and tunable white LED strips, a compatible LED controller adjusts the color temperature of the lighting and provides different tones of white.
Also, LED controllers offer different lighting patterns like- flash, blend, smooth, and other lighting modes. However, what is more impressive about the LED controller is that it has DIY color-making options that take your lighting to the next level.
Benefits Of Using an LED Controller
Changing the colors of your LED strips using a LED controller is an excellent idea, especially if you’re planning a party or want to draw attention to your sparsely decorated home. The following characteristics are included in every LED controller:
Adjustable Brightness Level
This functions to change the lighting brightness, and it makes the light glow brighter. So, you can control the night mode, which you may wish to shift to your room occasionally.
Lights’ Color Selection
Different pre-setted color options are available with a LED controller. You will find various variants of red, blue, and green colors within the remote. Besides these fixed colors, there are also DIY color mixing options.
Easy Color-Changing Modes
The LED controller allows you to switch colors easily. Just by pressing the buttons on the remote control, you can change the complete ambiance of your room. Also, there are different options for lighting patterns in the remote, such as flash, smooth, fade, etc.
Customizable Color
The LED controller includes a multicolor controller to mix red, green, blue, and sometimes white colors into your chosen customized color. You also have a choice known as “DIY,” where you can mix and match the colors you like and build it up however you see fit. So whether you want to make a statement with a bright, bold color or create a subtle and calming atmosphere, you can customize your lighting to suit your mood and environment.
Types & Features Of LED Controller
There are different types of LED controllers. Each of these has its specific functions and limitations. So, before purchasing one for your LED strips, look at the below categories of LED controllers:
IR LED Controller
IR stands for “Infrared Radiation.” This controller is frequently used at home because it is inexpensive and simple to use compared to other types.
| Pros | Cons |
| Not subject to electromagnetic interferenceLow-costing | Short control distanceDevices that don’t meet the same requirements are incapable of receiving signals from them. |
RF LED Controller
It’s referred to as radiofrequency. It connects both devices through a signal of some kind. This kind of controller is thought to have a medium range.
| Pros | Cons |
| Best for long-distance commutingSignals can penetrate objects and wallsNo face-to-face approach to light is required | Bit pricey |
Wi-Fi LED Controller
You can assume from the name that it requires Wi-Fi signals to connect to the sender. With a phone, remote control, or any other wireless device, you can connect to it. The Wi-Fi LED controller has the most extensive range of features compared to other controllers.
| Pros | Cons |
| Covers a vast areaNo cables or wires are necessaryCompatible with smartphone APPAllows voice control | Low networking capacityLimited expansion, primarily used in home |
Bluetooth LED Controller
This type of controller utilizes Bluetooth signals to connect the sender and controller.
Additionally, as it doesn’t require a network to connect or function, it is the best backup choice when there is no network.
| Pros | Cons |
| Easy installationGood user experiencelow power consumptionCompatible with smartphone APPAllow voice ControlLow cost | Incompatible protocols between different devicesLimited control distance |
0/1-10V LED Controller
Full touch control is available on the RGBW 0-10V LED controller. It provides each RGBW with quick color adjustment, brightness control, and many styles and effects.
| Pros | Cons |
| Reduces electricity useNo additional switch is requiredSuitable for multi-purpose lighting | Not compatible with the driver |
DMX LED Controller
A digital control system used in the lighting world is called a DMX controller or Digital Multiplex. Most manufacturers use it to light tables and projectors. It acts as a communication conduit between the gadget and its controller.
| Pros | Cons |
| Operates at low voltageAllows light customizationIndependent control between light sectionsVersatile lighting options Suitable for controlling larger light installation Can sync with music | Requires more cablesIncreased setup time with increased wiringExpensive |
DALI RGB Controller
Digital addressable lighting interface is abbreviated as “DALI RGB controller.” It is a two-way communication controller used in professional settings when numerous lighting fixtures are connected by just one light source.
| Pros | Cons |
| Enables quick and accurate controlEasy installation Reduce maintenance costDay-light sensing option | Expensive |
What Is the Most Effective LED Controller?
A remote-like tool called an LED controller is used to operate any LED light. The transmission method can be divided into various categories, including Bluetooth LED controller, IR LED controller, WiFi LED controller, RF LED controller, ZigBee LED controller, DALI LED controller, and DMX LED controller.
In the context of intelligent technology, there are three different types of LED controllers: WiFi, Bluetooth, and Zigbee.
Yet, when it comes to choosing the most effective one, it would be a tie between WiFi and Bluetooth LED. This is because Bluetooth LED controllers are more energy-efficient and cheaper than any other LED controller. Besides, they are suitable for small-area lighting control. So, if you are looking for a LED controller for your bedroom or any small space, going for Bluetooth ones will be an ideal choice.
On the other hand, WiFi LED controllers are renowned for their fast transmission rates. Besides, they allow you to operate the LED strips longer distances than the Bluetooth system. That is why I choose WiFi over Bluetooth LED controllers. Yet, if pricing is a concern, you can also go for Bluetooth one’s.
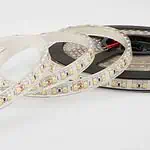
How To Connect an LED Controller To an LED Strip?
An LED strip controller is essential to a commercial color-changing LED lighting system. The user can adjust the brightness, switch the color, change the temperature, set a timer, set up multiple modes, turn on and off the switch, and personalize the color depending on the strip type and controller.
Different LED strip controllers exist, including RGB, RGB+W, RGB+CCT, and single color. You can directly link the power supply and LED strip to the controller. Also, you will use remote or other devices to connect with the controller to operate the strip.
- First, pick the LED strips you want. Next, select a power source and an LED controller. You need a DC power source with a specific voltage to connect to the controller.
- While attaching the LED strip to the controller, you’ll notice lettering on the LED strip that indicates how to wire it up correctly.
- Considering that you must connect R-RED, G-GREEN, and B-BLUE to the same controller terminal.
- Be aware that the controller’s V positive will be connected to the strip’s V positive.
- To install the wires, you must unscrew each terminal on the controller’s backside.
- Make sure to connect the wires correctly, then screw the terminal down such that it rests on the bare wire rather than the insulation surrounding it.
- The power supply will then be connected to the controller and power the strip afterward.
- To pair the controller with the LED strip, hit the button once within three seconds of the LED strip turning on.
- Following that, you can operate the strip using the remote.
That is how an LED strip and an LED controller are quickly connected at home. It is possible to do it fast by using the internet or viewing YouTube videos.
How To Pair LED Remote To LED Controller
You can pair an LED remote with an LED controller using the techniques listed below. But be aware that it can vary depending on the manufacturer and how many lights you want to pair.
Depending on the brand you bought, you must first push any button to access the LED controller settings. Then, as soon as it turns on, press any number key until all the lights flash red to confirm that the controller and remote are both in the same position. You will restore the LED controller’s color once it has been connected.
Thus, you can easily connect an LED remote to an LED controller.
Are all LED Controllers the Same?
No, not all LED controllers are equal. Specific remote controllers may be compatible. It depends on the brand of the LED strip. Some brands could have dedicated remotes for their strips. Others might support more than one type of remote.
Furthermore, specific LED strips may be chainable. Hence, they can join them without requiring a second controller. If your LED light is a well-known brand, a remote made by that company ought to function. Controlling several strip lights with a single remote is also possible.
Some LED controllers are developed exclusively for RGB light strips and pre-programmed lighting settings. Other controllers can dim or control several lights simultaneously.
Additionally, you can use RF controllers ranging up to 20 meters to control RGB LED light strips. Furthermore, analog and digital controllers and repeaters with the same power supply as the controller are available.
Installation of LED Controller
Installing an LED controller is a straightforward process. You can complete it in a few stages.
- Selecting the location for the controller installation is the first step. It is usually better to install it near a power source, such as an outlet or switch.
- You should also ensure that the controller is easily accessible to modify the settings. And, of course, without moving furniture or climbing ladders.
- Once you’ve chosen a position, you’ll need to run the appropriate wire from the power supply to the controller. Depending on your arrangement, you are routing cables through walls, ceilings, and beneath rugs.
- Checking your local construction codes is essential before running cables through walls.
- If you need to know how to attach the cables correctly, seek the advice of an expert.
- Once the wire is in place, connect the controller to a power source and test it.
- Check that all connections are secure and everything is in working order.
With these simple steps, you should have your LED controller up and running quickly!
How To Customize Colors With an LED Controller?
LED controllers customize the colors of the lighting system. It is an excellent way to bring vitality and originality to your environment. If you have the right tool, it can be simpler than you think!
Here’s how to adjust the colors on an LED controller:
- Choose the type of controller you require. Several LED controllers are available. It depends on your lighting system and the functions you want. Conduct the study and select one that meets your requirements.
- Connect the lighting system to the controller. Attach the appropriate type of LED controller to your lighting system using the instructions in the user manual.
- Configure the options. The settings on the LED controller may vary based on the device. However, most controllers will allow for basic customization. Such as changing color themes and brightness levels.
- For each channel, select the appropriate color and intensity. You can do this by utilizing a color wheel, or pre-programmed color presets.
- Examine the settings and make any required adjustments. Once you’ve customized the parameters, test them out. Also, make any modifications necessary to achieve the desired effect.
These procedures can create seamless customization of the colors of your lighting system.
Things To Consider While Installing LED Controllers
Before putting LED controllers in your house or company, consider these specialties:
Well Ventilation
When deciding where to put the LED controller, ensure it has enough airflow. The space should be well-ventilated. Also, you should provide lots of fresh air to remove any heat the controller creates.
Also, consider supplying extra cooling with fans or other equipment. Keeping combustible objects away from the controller is also critical. Hence, they might catch fire if subjected to extreme heat. Finally, before installation, examine your manufacturer’s instructions. If you have any queries about ventilation needs, follow them.
Match The Power Supply
When installing LED controllers, ensure the power is correct. And they are functioning correctly. The power source should match the LED controller’s voltage and amperage.
It’s also essential to ensure the wattage rating is enough for the number of controlled LEDs. When in doubt, get guidance from an expert on selecting the best power supply for your application.
Prohibit Wiring With Electricity
Ensure all electrical connections are properly secured and insulated when wiring LED controllers. This helps to avoid electric shocks or fires caused by poor wiring. It is also critical to double-check the wiring before attaching the controller to the power supply.
It is advisable only to use the controller if any connections are secure or have exposed wires. Instead, contact a professional for help.
Troubleshooting the LED Controller
While operating an LED controller, you may face several problems. Some such conditions are as follows-
LED Light Flickering
If the power source fails, the LEDs may flicker or stop working. You should inspect the circuit board’s connections if this does not work. Check that they are tight and secure. Make sure that all components are securely placed onto the board. The most straightforward solution for light flickering is to replace the controller’s power source.
Yet, if the flickering persists, it might be due to a defective component on the board or poor cabling. In this case, expert help is needed to replace or adequately rewire the component.
Bad Pin Connection
First, inspect your LED controller’s pins. Also, check the connections to verify that they are not deformed or broken. If they are, straighten them out using a little pair of pliers.
Second, ensure that the pins are securely linked and in position. If they are loose, you can use a tiny quantity of solder to fix them in place.
Finally, inspect your wires for signs of wear and strain. Replace any frayed or broken cables with new ones to maintain a secure connection.
Poor Connection Between Cutpoints
Begin by checking the connections between the cutpoints. Check that all cables are secure and free of corrosion or other problems. If the connection appears to be secure, investigate the power source. Check that it gives you the correct voltage and enough power to power your LED controller.
If the connection between the cutpoints is still not operating correctly, it may be time to replace some of the LED controller’s components. Examine the parts for flaws and replace them if necessary.
It is also critical to ensure that all your components are interoperable to operate at the proper voltage.
Low Voltage from Mains Power Supply
A controlled power supply is one approach. A regulated power supply keeps the voltage output stable. It also allows the LED controller to receive the proper amount of electricity.
Another possibility is connecting a capacitor between the power source and the LED controller. This will help stabilize the voltage output from the primary power source. In addition, it can reduce the ripple effect that might cause low voltage.
Communication Error from the Controller
The first step is to ensure that the controller and the LED lights are correctly connected. Then check for loose or damaged wires and ensure all cables are locked. Finally, restart the controller if all connections are in good working condition. This can assist in resolving any communication challenges that may have arisen.
You might reset the controller to factory defaults if none of these alternatives work. It is possible to do so by momentarily pressing and holding the reset button. This should handle any communication difficulties after finishing this.
Radio Interference from External Sources
One of the most common ways to reduce interference frequency is to use shielded cables. Shielded cables are designed to block out unwanted signals. In addition, they make them effective at lowering interference from outside sources.
Yet, it is also vital to ensure that all wires are securely tied and fixed appropriately for most safety.
The EMI filter is another option. This gadget assists in filtering out undesired radio frequencies, thus reducing interference. It can mount between the LED controller and the external source. Or directly on the LED controller.
Malfunctioning Power Supply
First, look for any loose or disconnected wires in the power supply. If the cables are not correctly connected, electricity will not flow properly, leading to the power supply failing.
Hence, the fuse could have blown if you had not connected all the wires correctly. Therefore, you can resolve the problem by replacing the defective fuse.
Voltage Conversion
Voltage regulators are the initial answer to this problem. Regulators regulate the incoming voltage to the required level. This system has the advantages of being straightforward to install and dependable.
A DC-DC converter is the second option. This gadget will transform the input voltage into a new form. This can be handy if you operate an LED controller at a lower voltage.
Auto-transformers are the third option. This gadget will transform the input voltage into a new form, allowing you to use the LED controller at various voltages.
Excessive Brightness
Adjust the dimmer settings: Many LED controllers include built-in dimmers that you can use to lessen the brightness of the lights. Change the darker settings to get the desired effect.
Add a dimming circuit: If the LED controller lacks a built-in dimmer, you can buy a dimming circuit. After that, insert it into the controller. This allows you to customize the brightness of your lights as required.
FAQs
Conclusion
In conclusion, LED controllers are an excellent tool for controlling and managing the brightness of LED lights.
Due to their superb efficiency and dependability, they have grown in popularity. With the help of LED controllers, users can create beautiful displays and customize their lighting needs.
Furthermore, they have a long lifespan and need minimal maintenance. In summary, LED controllers are a great all-around product for anyone looking to upgrade their lighting system. Yet, if you are searching for the best quality LED controller and LED strips, contact LEDYi ASAP.