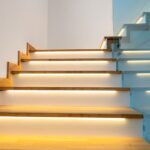
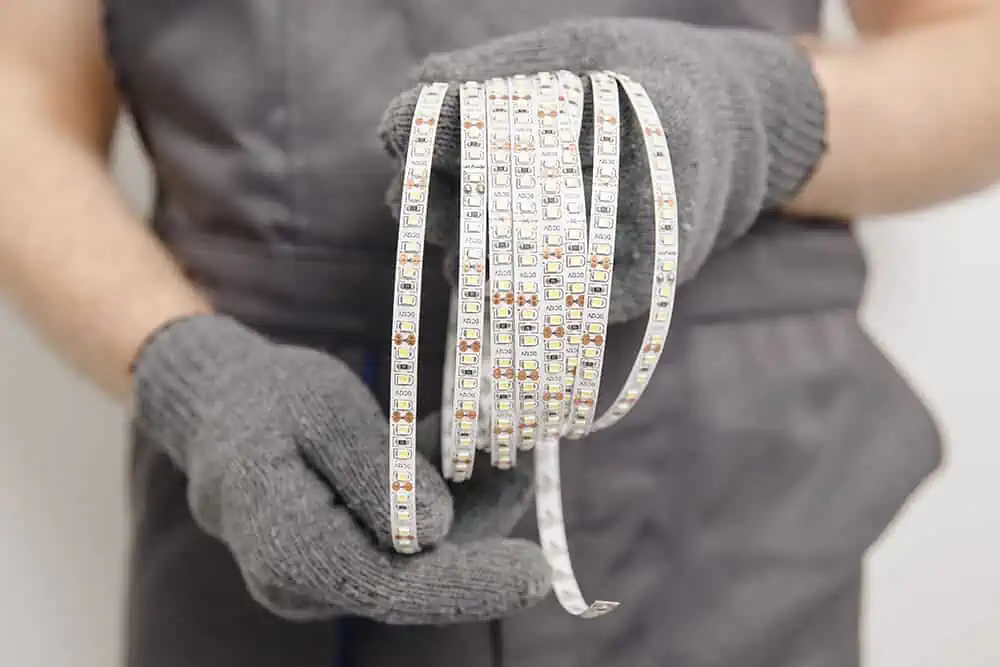
Currently, LED strip lights are among the most in-demand and enticing components of decorations for most occasions. They are an excellent choice for aesthetic purposes since they produce a fantastic lighting and illumination effect when the light is reflected from a flat surface.
Ideally, you need to prepare the surface by eliminating dust and dirt, stick the LED strip to the surface, cut the additional length, and secure the strip with a layer of sellotape or transparent tape.
This article illustrates the complete process of LED strip light installation on your ceiling. You can install strip lights at your home, office, or premises.
Pre-Requisites
Having the appropriate equipment for your project is crucial whether you’re a professional electrician or a novice LED installer. Check out the tools below to see what you’ll need to install your LED strips correctly.
- A Wire Cutter
The installation of wiring to LED strip lights is made simpler with the help of a wire cutter, which is essential for cutting and stripping 16-22AWG stranded wires to appropriate lengths.
- Screwdrivers
One of the most crucial things to have during installation is a tiny flathead or Phillips screwdriver because most LED components require them.
- Voltage Tester
A voltage tester is an efficient tool for investigating your electronic connections. Using this equipment, one can quickly determine the electrical potential difference between two places in an electric circuit.
- Heat Shrink, Electrical Tape, and Wire Connectors
Whether using wire nuts or electrical tape to connect the wire and apply heat shrink, it’s crucial to use suitable connectors when mounting an LED project.
- A Soldering Iron (Optional)
A cheap soldering iron will be a good investment if you intend to work with LED strip lights because you can cut and reconnect the strips to the precise lengths needed for your project.
Required Skills & Some Points To Ponder
A novice isn’t recommended for LED strip lights installation without expert supervision. Although the process is simple, you should still have the following basic skills to achieve a smooth installation.
- Working with strips isn’t everybody’s figure tip. Prior to operating with the electrical wires, having an exact thought regarding their functions is fundamental. It’s critical to have some essential information on utilizing the proper hardware and connecting the correct links in the position.
- Clients can favor interfacing at least two outings to a solitary power source. It’s fundamental to have a two-way power splitter to head towards involving an isolated power connector for fueling the Drove strips. Prior to initiating work with the connector, it’s vital to check that the wattage of the strips doesn’t exceed the connector’s complete result limit (total output capacity).
Having an exact vision of these connectors and careful steps before utilizing them essentially. Posting down the similarity of the strips and the connector ought to be thought of. The client ought to know the associating method of the splitter to the connector before connecting it to the attachment.
- Procuring information about the apparatuses expected during establishment is fundamental. The sort of apparatus utilized in the technique is wire stripper, voltage testers, screwdrivers, electrical tapes, and many more.
- An estimating tape can be utilized to gauge the border of the surface for introducing the strips. An exact estimation will help with giving a faultless focus on the oriented surface.
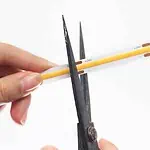
The LED strip lights are managed concerning the length of the surface with some scissors. It’s smarter to cut the strips following two copper dots intended toward the finish of LED units. In any case, managing from these spots won’t hamper the electrical conductivity of the strip.
Safety Precautions
Here are some safety tips you must follow while installing LED strip lights in your home or anywhere else:
- The LED strips may become stained with paint while the walls are being finished or when renovation work is being done. As a result, the led chip’s light’s hue gets degraded.
- The LED strip must be removed carefully. Avoid pulling the strip so hard that it snaps, and avoid applying excessive pressure to the LED chips because doing so will cause them to crack, exposing the “holes” in the strip’s light line.
- It is crucial to choose the strip at the designated spots; otherwise, a section can be interrupted, which would cause the LEDs to burn out.
- Correctly position the curves on the strip. Following suitable curvature rays and adhering to the upper and lower limits outlined in the guidelines is crucial.
- Respecting the voltage specified in the led strip’s usage instructions is crucial. The device will be permanently harmed if a 24V led strip is connected to a 220V system.
- Use LED strips with the correct IP rating because an item with the right level of protection is necessary for the LED strip’s durability.
Step-by-step Installation Guide
Below are complete instructions for installing LED strip lights. But before proceeding to the installation, please test your LEDs to ensure they’re operational.
- Measure the Length of the Strip That Will Be Used
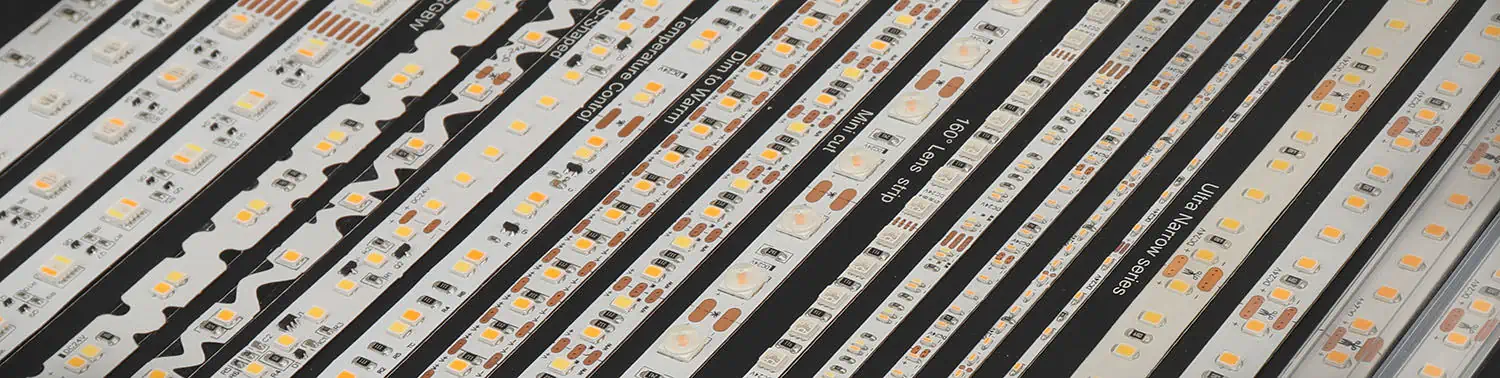
Estimate how much LED illumination you’ll require. Measure each position if you plan to put LED lights in various spots so you can later cut the lighting to fit. Then purchase enough strip lighting to cover the length entirely. The most well-known strip lighting manufacturers are LEDYi and Phillips Hue.
Both businesses produce fully programmable RGB (red, green, and blue) Bluetooth-controlled lights. Even numerous strips can be synced to match one another. Corsair has intriguing strip lights if you want something bolder and thicker than the thin light strips. Avoid the addressable RGB lights if you need simple white LEDs to save money.
- Wash the Surface Before Installation and Dry It
The area where the strip lights will be installed should be cleaned with a clean cloth. If any residue or dirt needs to be removed, use vinegar, soap, or water. If it’s wet, thoroughly dry the area. This will guarantee a smooth and long-lasting attachment of the adhesive strip. You can install LED strips on plastic, wood, metal, or vinyl. Any flat, smooth surface will do. Strip lighting should not be installed on painted drywall or textured surfaces like orange peel since the glue eventually starts to peel off.
- Remove the Sticker-Like Adhesive Strip’s Backing
If you haven’t already, unpack your strips. Do not unravel the strip; keep it wound on the circular spool. Pull the backing off the first 6 to 18 inches by undoing the very end of the spool, depending on how much you want to start with. The light strips come in a single piece, although attaching large amounts at once can be tricky. Do not speed up the adhesive application process because doing so will reduce its effectiveness.
- Cover the Surface with the Strip Lights
Start by planning where you will plug the strip in. Carefully place the first portion of the strip against the wall, desk, cabinet, or whatever surface you’ll be mounting the lights on. With the help of your hand, flatten the strip and firmly press down on the area. If necessary, you can use an extension cord, but it will be simpler if you immediately start near the outlet you intend to use. If there is a slight bend or gap, don’t be concerned. The strip will remain in place as long as the vast majority of it is adhering to a spotless surface.
- Keep Removing Backing Until the Entire Area is Covered
Continue to open the reel and remove the backing as you go. Apply firm pressure as you press each segment of the strip lighting into the surface. Work slowly and try to keep the lights as straight as you can. Take your time, and pay close attention to any corners you need to work around. If you have to navigate around a corner, take your time and try to fully press the adhesive of the strip into the area where the edges meet. Press the strip back to the center line where you’re placing the lights if you find yourself straying off course. It’s usually relatively easy to work with this stuff.
- Use Scissors to Trim Any Extra Strip of Lighting
For instructions about where to cut to prevent harming the lights, check the manual that came with your strip lighting. Every 2-3 inches, there are typically gold threads or scissor markings where you can securely trim the lights. Cut off and discard the surplus light sections.
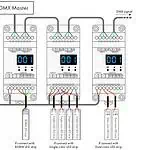
- Attach the LED Strips to the Controller and Plug Them In
In the outlet, insert the power brick included with the light strips. The controller unit should then be attached to a surface by removing the adhesive backing. Please feel free to leave it undisturbed if it rests on a surface, such as the inside of a cabinet or an end table. Place the controller in a hidden location if you don’t want it to be seen.
Quick Tips for Smooth LED Strip Lights Installation
Here are some quick tips to keep in mind while installing LED strip lights. Don’t forget to follow these tips to experience the best LED lights and avoid any damage.
- Prior to beginning the establishment strategy, going through the establishment of the product is fundamental. Gaining management over the significant marks of the item lessens the gamble of any debilitation. Then again, ill-advised changes can likewise bring about a flawed setup.
- Make sure there are no signs of damage on the new bulb or light strings. This involves keeping an eye out for diode failures, exposed wire, and fractures. Your replacement bulb may malfunction due to any of these problems.
- Double-check the area where you intend to install the lightbulb or string of lights. Make sure they are away from children or your pets if they are inside. Never overcrowd it with anything that may catch if the bulb breaks. Instead, leave some space between pieces of furniture.
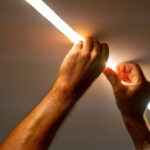
- Be sure to remove the old bulb after switching off the electrical power if replacing any existing bulbs. Because the bulb still receives an electrical current when the light switch is on, doing so is never safe.
- Positioning is crucial when using LED holiday lights or business string lights, especially on roofs or in difficult-to-access locations. So before attempting to mount a ladder and hang string lights, devise a plan on paper.
- After ensuring everything is in place and having one final review, you can connect to a light source. To test a lightbulb in your home, all that is necessary is to turn the knob or press the switch.
There are a few things you may do to protect your family in case of an emergency at any time:
- Always keep supplies in your house that can be used to put out fires or treat injured people with first aid. This includes first aid kits that are well supplied and fire extinguishers.
- If you have an electrical emergency, such as a fire or an injury, turn off the power immediately. This entails disconnecting the appliance from the wall or turning off the power at the electrical box.
- Immediately dial 911 if you or a family member is harmed or your home is on fire. While you wait for emergency services to arrive, leave the house. Call an electrician to have those things looked at if you’re having any electrical problems that you think might cause an emergency.
FAQs
Conclusion
There is undoubtedly a lot of information provided in this article. If you are learning about LED strips, you probably have many questions, and your brain is probably spinning with information. If this is the case, start by asking yourself some basic questions, which should make it easier to follow the above instructions and locate the ideal LED strip lights and components.
LEDYi manufactures high-quality LED strips and LED neon flex. All of our products go through high-tech laboratories to ensure the utmost quality. Besides, we offer customizable options on our LED strips and neon flex. So, for premium LED strip and LED neon flex, contact LEDYi ASAP!