Fairy lights or mini-lights are an excellent addition to the interior and exterior design that adds a festive look to your place. They are available in a wide range of colors and are easy to install and maintain. Let’s explore the common queries about using and installing fairy lights:
Fairy lights are tiny, colorful bulbs connected through a flexible wire that are used for decoration purposes. This decorative lighting is made of LED-based bulbs. They create a soft glow when used in indoor or outdoor decoration for weddings, parties, or other occasions.
Fairy lights also go by some other names: twinkle lights, string lights, holiday lights, Christmas lights, or mini lights. Additionally, in some areas of the United States, like Chicago, these are called “Italian lights”. The name emerged because the first miniature fairy lights were made in Italy.
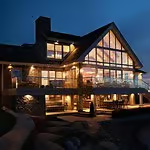
Fairy lights are mainly used for decoration on different occasions. Also, they add an aesthetic and festive look to the interior design of the house. These lights create a charming and cozy atmosphere in both indoor and outdoor spaces. Due to its versatility in colors, styles, and power sources, it can serve various needs and preferences.
Fairy lights are draped around walls, windows, curtains, ceilings, chandeliers, mirrors, bookshelves, mantels, staircases etc. For example, it can be used to highlight bedroom ceilings. Just hang the strings vertically along the corners of the bedroom wall from the top to the floor. Apart from that, you can use these lights to highlight the edges of your bed’s headboard.
Additionally, decorative fairy lights with creative designs can replace traditional bedside lamps or chandeliers. In the outdoor space, these are wrapped around trees, bushes, or patios for an aesthetic look.
The fairy lights should not be put between two swaying trees. It may tear or break the strings of lights when the trees move. Also, it can lead to safety hazards. After that, hanging these lights underneath overhanging branches is also a bad idea. The overhanging branches will damage the lights with falling leaves, twigs, or heavier branches. As a matter of fact, the strings can catch on fire if they generate excessive heat and come in contact with dry leaves.
Furthermore, do not use fairy lights on weak or unstable structures and areas with heavy foot traffic. It will cause accidents when people or pets trip over the strings.
Sir Joseph Swan was the father of fairy lights, who first invented the fairy lights. As a matter of fact, he was a physicist, chemist, and inventor of the first incandescent light bulb. The Savoy Theatre in London was first decorated with fairy lights almost 135 years ago by him.
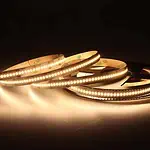
Fairy lights are commonly made of three main components: small LED bulbs, a thin wire, and a power source. The modern fairy lights are made of LEDs because they are energy-efficient and better than traditional incandescent bulbs. The wire is typically made of copper or silver so that it can be flexible enough to give various shapes. Finally, there are different types of power sources used for fairy lights, such as battery-operated, plug-in, or solar-powere,d etc.
Installation FAQs
It depends on the brand of the fairy lights. Check the description if it can be cut while purchasing. If it says yes, then the wire of the lights can be cut according to the required length.
Some of the options regarding hanging fairy lights without damaging walls are discussed here:
- Hanging fairy lights on the already hanging items on the walls, like shelves, picture frames, etc, will prevent damage to the walls.
- Command hooks attached with adhesive strips can be used to prevent damage to the walls.
- Brick clip hangers are used for brick walls without drilling holes into the walls.
- A mini light holder with a suction cap is another great option for hanging fairy lights without damaging walls.
- Fairy lights are attached along the border of the bed’s headboard using double-sided clear tape.
- Installing these lights around the bedroom mirror with an adhesive hook or tape gives additional lighting for the mirror use.
- Twinkle lights wrapped around the indoor plants in the bedroom give a gorgeous look.
- A long string of fairy lights can be bottled inside a clear vase and kept on a shelf, desk, or bedside table.
- Fairy light nets are used to cover an entire wall of the bedroom with lights.
- Hang the photos from the strings of fairy lights on the bedroom wall using small pegs.
- Initially, the specific curtain fairy lights should be chosen based on the length of the curtains, the size of the space, and the desired colors and effects.
- Then choose among tension rod, curtain clip, adhesive hook, or nails and screws to attach the lights. For example, the tension rod can be fixed inside the window frame, and it is spring-loaded. Just slide the lights onto the rod and then adjust the length as necessary.
- Hanging curtain lights with the curtain clips is easier among all. You need to only attach the lights to the curtain directly to hang them.
- The adhesive hook is also used to hang the wires of the curtain lights onto the hook. Make sure the hooks are able to withstand the weight of the curtains.
You can drill nails or screws into the walls to hang them up and organize them as you want.
- The simplest way of installing fairy lights on the balcony is to drape them. First, place the hooks in between posts or spacing of a foot or two. Then go around the balcony to cover every side. It will create a wavelike pattern while the fairy lights drape within themselves.
- The fairy lights can be installed in a spiral design on the rafters or shade bars. This style will highlight the whole structure.
- Apart from that, hang the fairy lights straight down from the beams down to the railings to create a curtain of lights on the balcony.
- Creating Zig Zag Pattern: Measure the length and width of the ceiling and select the distance between anchor points on the ceiling. Two to three feet of distance between the points will give off a soft glow, but a lesser distance will give off more brightness. Now secure the adhesive or screw hooks at a consistent distance on the ceiling, keeping the first hook near the power outlet. Then run the string lights extension cord along the corner of the wall up to the power outlet. After that, space each hook along the distance measured previously from one side of the ceiling to the other. Repeat it on the opposite side of the ceiling by moving it over half the spacing from the other side without lining it up evenly. It will create a zigzag pattern. Now string the lights up until the whole ceiling is covered.
- Outlining The Ceiling: Attach the hooks two feet apart along the border of the ceiling. Then string the fairy lights around the first hook and keep going around the ceiling until the last hook.
- Making A Canopy Design: First, the area above the bed and the area between the ceiling and footboard should be measured to determine the width of the canopy over the bed. Then, position the hooks across the other end of the ceiling to recreate a starry canopy-like ceiling. Also, place more hooks beyond the fairy lights to hold the sheer curtains. Finally, string up the fairy lights and attach the sheer curtains on the hooks above the fairy lights.
- Draping String Lights Across The Ceiling: Place adhesive hooks from one side of the ceiling to the other side. String up the lights around the hook and then let it droop for around 15 cm and move on to the hook. Double wave-like patterns or crisscross patterns can be created here while draping the string lights.
- Start wrapping the string from the lowest part of the trunk.
- Then move to the branches to wrap them with lights with consistent spacing.
- After finishing wrapping, secure the lights with zip ties or tape. Make sure they are firmly attached to the tree without disturbing its growth.
- Now plug them in and enjoy.
- First, mark the place where the light strings will be hung. Keep the fixing points a minimum of 3.2 m above the ground level.
- Now use an electrical drill to make small holes for every marked point.
- Then screw the hooks tightly to make sure they do not become loose.
- After that, attach the string lights starting from the power plug end to the fixing points using zip ties. Keep a 3 m distance between the ground and the string light.
- Finally, connect the power plug to the power outlet to light up the fairy lights.
Controllability FAQs
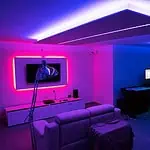
Yes, there are RGB color-changing options for fairy lights. The colors can be set in different speeds and sequences using a remote or smart apps.
The LED fairy lights are powered by electricity through a plug, USB connection or battery. The battery-powered fairy lights use AA, AAA, or CR2032 batteries. Furthermore, the USB-powered lights are connected to a USB port on a computer, power bank, or adapter. Finally, the plug-in system requires a standard wall outlet and an adapter for power.
The battery pack of the fairy lights can be hidden behind props like photos, vases, flowers, fake snow, etc. Also, in mason jars, the battery pack is taped to the lid to hide it.
Yes, multiple strings of fairy lights can be connected together. However, the number of strings for connection depends on factors like the wattage of the lights, overall power draw of the circuit, capacity of the circuit breaker, etc.
For incandescent mini lights, 4 or 5 sets of them can be connected end to end. Additionally, for LED mini lights, 40 to 50 strings are possible to connect together.
Safety FAQs
The LED fairy lights can be left on continuously for 24/7. It is highly unlikely to catch fire because it emits very little heat and infrared radiation.
Fairy lights with operational temperatures around 23°F or -5° C are usable in the cold. The instructions for the fairy lights must be checked for their suitability in cold temperatures before outdoor use.
The fairy lights with an IP67 rating have waterproof features. The ‘7’ in the rating means it can be used under one meter of deep water for 30 minutes.
Most of the fairy lights are generally suitable for indoor use. However, it is better to check the manufacturer’s guide for labels such as ‘outdoor’ or ‘weatherproof’ before using them outside.
The LED fairy lights generate a very minimal amount of heat compared to other light sources. Even this little heat can easily escape without making the bulb hotter or increasing its temperature.
Operational FAQs
Yes, the battery-operated fairy lights can be kept in resin, but the battery pack or power source should be kept separated from the resin. For making DIY projects with resin and fairy lights, first, add the resin to the mold for the base. Then insert fairy lights and pour the final layer of resin on it.
LED fairy lights last up to 60000 hours. It is 20 times longer than traditional incandescent lights. On the other hand, the battery-operated fairy lights with incandescent bulbs last only a few hours per battery set. Additionally, the solar-powered fairy lights last for around 5 years.
Yes, there are several modes for fairy lights to control speed, color, flashing, fading, etc. These options are controlled through either remote or smart applications.
While buying fairy lights, their color, length, intended use, power source, and light type should be considered. For example, to avail energy-efficient fairy lights, LED light is the best option. For portability, battery-powered fairy lights are better than plug-in options.
Solar Fairy Lights FAQs
The solar fairy lights are not bright enough for reading or playing games in a large playhouse. However, they are best suited for decoration and aesthetic appeal.
Solar fairy lights would work for an indoor garden with a lot of natural daylight if the panel is mounted outside. Otherwise, the glass will use up most of the charge and reduce the performance of the lights.
Yes, solar fairy lights work in winter as long as they receive enough daylight to power up the batteries. However, reduced sunlight and colder temperatures may affect their performance, like shorter running times, dimmer illumination, longer charging periods, etc.
Other FAQs
Fairy lights need to be stored in a cool and dry place without any tangles. Cardboard tubes, rectangles, or cloth hangers are used to organize them. For instance, wrap the lights around a wrapping paper tube, a kitchen roll tube, or a solid cylindrical object. Then tuck the ends in and tap them securely.
Also, cardboard rectangles can be used by cutting slits in the cardboard and inserting one end of the lights while wrapping the lights around the cardboard. Apart from that, one end of the lights is secured on a clothes hanger, and the rest of the lights are wrapped around the hanger to store them tangle-free.
Yes, fairy lights are suitable for various occasions, including weddings and parties. These are draped over walls, tables, or even trees to get an aesthetic look. Also, it is used to highlight the aisle and romantic backdrop at a wedding.
Yes, LED fairy lights are more energy efficient than traditional bulbs. For example, a 10-meter LED string only draws 3 watts, which saves up to 75-90% energy.
Yes, fairy lights come in different colors. There are white fairy lights with warm white and cool white tones. In addition, it comes in a single color and multiple colors with color-changing options.
LED fairy lights produce less heat than traditional lights. So, it saves up to 75% of energy. Also, it lasts up to 20 times longer than traditional lights. It needs less replacements and maintenance costs. More importantly, it is durable and safer for long-term use.
Fairy lights with glass bulbs are more often incandescent, and lights with plastic bulbs are LED. After that, if there is a filament inside the bulb, it is incandescent. They also create light with heat. However, LED fairy lights do not warm up and remain at room temperature.
Yes, you can sleep with fairy lights on. They are not too bright and create a cozy atmosphere for falling asleep. Fairy lights with a timer can be used in this case to turn them off after a period.