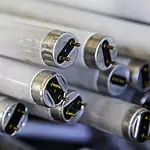
Fluorescent tubes to LED lighting conversion is one of the smartest upgrades you can make for your home or business. LEDs offer comparatively higher energy savings, longer lifespans, and better light quality compared to traditional fluorescent tubes. Besides, it is quicker and more straightforward to convert!
The best options to convert fluorescent tubes to LEDs range from simple plug-and-play replacements to complete fixture upgrades. Users pick each one for their different needs and budget planning.
Keep reading and find out some top conversion options to help you choose the right one for your setup.
Why Convert Fluorescent Tubes to LEDs?
It is a smart move to switch from fluorescent tubes to LEDs, as it is both cost-saving and ensures improved lighting. Beyond that, here you can check some top reasons for converting the fluorescent tubes to LEDs:
Energy Efficiency
LEDs consume up to 75% less energy than fluorescent tubes. So it reduces your electricity bills and helps you save a lot.
Longer Lifespan
LEDs can last up to 50,000 hours or more, whereas fluorescent lights last only 15,000 hours. That means with fewer replacement costs and maintenance, you can expect to use light for a longer time by upgrading to LED.
Better Light Quality
With LEDs, you will enjoy consistent, flicker-free light with improved color rendering. It improves visibility to the entire space where you have installed it and helps you create an ambient environment.
Durability and Reliability
LEDs are tough enough and can easily resist shock, vibration, and temperature extremes. If you are looking for a durable lighting setup for your commercial or industrial setting, this would be a great choice for you.
Emits Less Heat
LEDs emit less heat than fluorescent tubes. Fluorescent lights convert only 20-25% of the energy into visible light, and the remaining 75-80% light is lost as heat. In contrast, LED lights convert 80-90% of their energy into light and leave only 10-20% as heat. It effectively maintains cooler indoor temperatures and lowers your cooling costs as well.
5 Best Options to Convert Fluorescent Tubes to LEDs
Here we have listed 5 best and efficient methods you can consider to convert your Fluorescent tubes to LEDs:
Best Conversion Options for DIY:
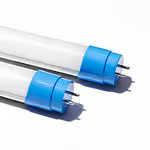
Method 1: Direct Replacement LED Tubes (Plug-and-Play)
Direct replacement LED tubes are mostly known as the plug-and-play or Type A tubes, which directly replace the existing fluorescent tubes without the need for rewiring or ballast replacement.

The type of LED tube you will get is compatible with the existing electronic ballast. It follows the simple “plug-and-play” installation method wherein you only need to replace the old fluorescent tube and snap in the new LED tube. What’s more is that you don’t even need to switch off the main power. Just insert the new LED and tap the power button to turn it on.
| Pros | Cons |
| • Easy and quick installation method without the need for rewiring. • Saves labor and installation costs • Ideal for quick upgrades in offices, retail, garages, and other commercial spaces • Protects ballast from sudden current surges, potentially extending ballast life | • Users often face compatibility issues with some ballast types • Often causes high maintenance |
Method 2: Hybrid LED Tubes
If you are looking for the most flexible and efficient approach to convert fluorescent tubes to LEDs, hybrid tube replacement methods are the go-to solution. You can install these tubes in two ways. Either in the Plug-and-Play Mode, where you can insert the LED directly into existing fluorescent fixtures with the use of the current ballast.
But in case the ballast fails or if you want to improve efficiency, you can rewire it to bypass the ballast. Here, you may need to remove the fluorescent ballast entirely. This dual-mode option makes the hybrid LED tubes a versatile solution to transform fluorescent lighting.
| Pros | Cons |
| • Can work with both electronic and magnetic ballasts • Offer quick and easy plug-and-play installation, where you won’t need any immediate wiring • Offers fast installation and minimizes downtime | • You may need to consider the Higher upfront cost compared to single-mode LED tubes • The chances of being less energy efficient than dedicated ballast bypass tubes • Need to seek professional assistance for rewiring the ballast bypass |
Safety Tip for DIY Enthusiasts:
If you’re unsure about rewiring or dealing with ballasts, it’s always safest to consult a professional. Electrical work can be hazardous, so if in doubt, get expert help.
Best Options for Professional Electricians
Method 3: Bypass Ballast LED Tubes (Direct-Wire)
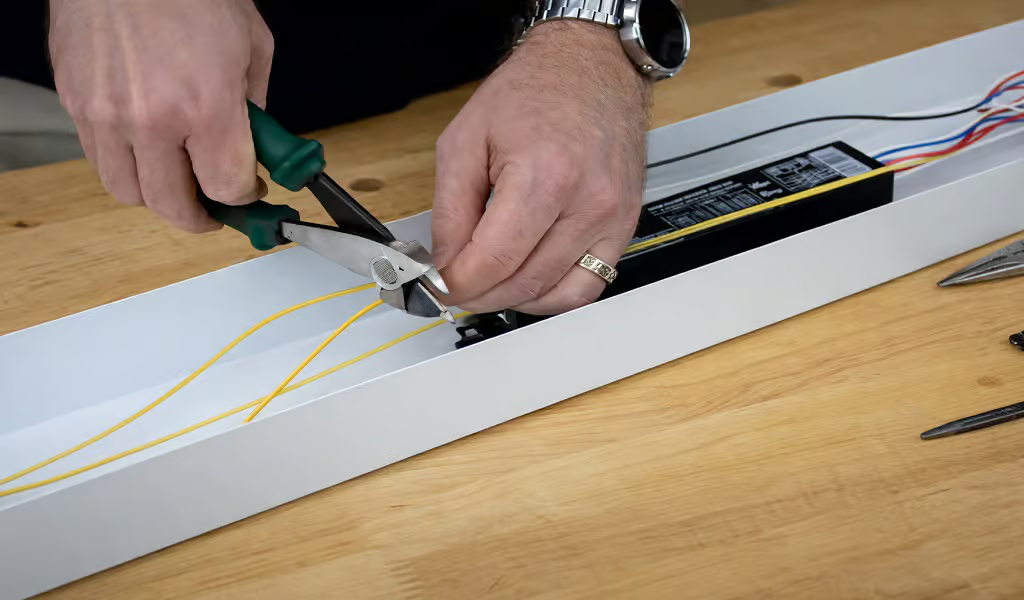
Bypass the ballast LED tube, or Type B or Direct-Wire LED tube replacement, is another popular listed approach to convert fluorescent tube fixtures to LED lighting. Here, the users need to remove the fluorescent ballast entirely and rewire the fixture to supply line voltage directly to the LED tube.

After turning off the power supply, all you need to do is cut all wires connected to the ballast. This includes hot, neutral, and ground wires, including the starter if it’s the magnetic ballast. Once you have unscrewed the ballast from the fixture, insert the Type B LED tubes into the rewired fixture. Then ensure the connection and secure cords at both positive and negative ends.
| Pros | Cons |
| • Improve the system efficiency and reduce the maintenance costs • Offers higher energy efficiency with longer LED lifespan • You have the option to use the advanced LED features • Fewer chances of flicker and operational issues | • Requires notable electrical rewiring and ballast removal • You must seek a qualified electrician to complete the project efficiently. |
Method 4: Replace with LED Retrofit Kits
You can choose LED retrofit kits to upgrade existing fluorescent fixtures. In the replacement method, you need to replace the internal components with LED modules, drivers, and sometimes new housings. Simply just uninstall the fluorescent lamps, ballast covers, and the ballast, and replace the LED retrofit gear tray inside the fixture.
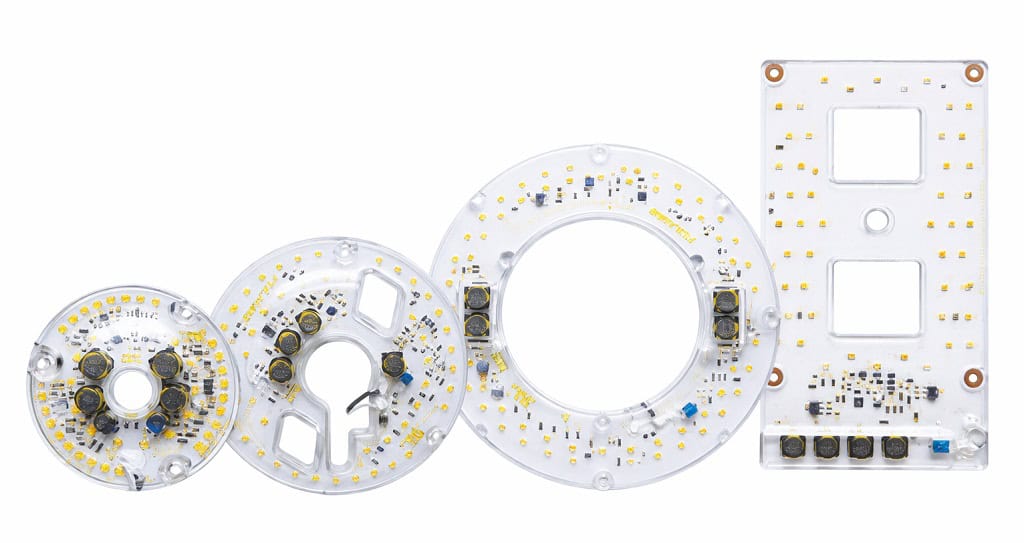
Then rewire the power connections and feed through the LED driver directly. Lastly, ensure a secure connection of the retrofit kit by tightening the self-drilling screws. All in all, it would be an energy-efficient LED light source where you won’t need to replace the entire fixture.
| Pros | Cons |
| • Helps in installing into the existing fixtures. • Reduces waste and cost • Provides high-quality LED lighting • Easily compatible with various fixture sizes and types • Improves energy efficiency and lifespan | • Need a qualified technician for replacement and installation. |
Pro Tip for Electricians:
Consider switching to LED retrofit kits in commercial spaces where energy savings and durability are top priorities. It’s an efficient and sustainable choice for long-term installations.
Best Option for Commercial Users
Method 5: Replacing the Entire Fixture
Beyond all the above, one last method. You can replace the entire fluorescent fixture with a smart LED fixture. By this, you can ensure advanced lighting features and enjoy a higher energy efficiency.
In this process, all you need to remove is the entire old fixture and then install a new smart LED. Secure the connection with the proper wiring connections. Often includes wireless controls, dimming, scheduling, and color tuning.
| Pros | Cons |
| • Offers maximum energy savings • Includes advanced features such as remote control, dimming, and automation • Reduce the hassles of all ballast and wiring compatibility issues • Improves the lighting quality | • Expensive due to replacing the entire fixtures • Requires professional installation for safety. |
Cost-Saving Tip for Commercial Users:
Investing in energy-efficient LED lighting will pay off in the long run through reduced energy bills and maintenance costs. Consider conducting an energy audit to determine the most effective conversion method for your space.
Different LED Tube Sizes and Options For Conversion
1. T8 (1 inch)
- Diameter: 1.5 inches (3.81 cm)
- Common Lengths: 2 ft, 4 ft, 8 ft (approximately 600 mm, 1200 mm, 2400 mm)
- Base Type: Bi-pin G13

You can pick the T8 tubes as the first choice for converting the fluorescent fixtures to LED. They bring a good balance in the light size and brightness, which is perfect for use in offices, schools, hospitals, and retail environments.
It typically comes with high luminous efficacy, which often ranges between 90 to 120 lumens per watt. The best part, you will find it in various color temperatures. This is like 2700K or warm white to 6500K or daylight, and you will have even more options for customization. Besides, expect to have different CRI ratings between 80 and 90 to ensure a good color balance in all cases.
2. T5 (5/8 inch)
- Diameter: 5/8 inch (1.5875 cm)
- Common Lengths: 2 ft to 5 ft (approximately 600 mm to 1500 mm)
- Base Type: Bi-pin G5

This range of tubes is mostly similar and comes in a compact design compared to other models. But they ensure higher energy efficiency and brightness per watt. To install these tubes, all you need are electronic ballasts.
You can easily install and use the tube as a task light for the under-cabinet, display cases, or narrow ceiling spaces. The luminous efficiency of the T5 bulbs is 100 lumens per watt, while some premium models can reach up to 130 lumens per watt.
Though you can expect to have a higher initial cost, the operational effect will save a lot. For this, you can install the tube in any of your commercial spaces, like offices, retail spaces, and healthcare facilities.
3. T12 (1.5 inches)
- Diameter: 1.5 inches (3.81 cm)
- Common Lengths: 2 ft, 4 ft, 8 ft (approximately 600 mm, 1200 mm, 2400 mm)
- Base Type: Bi-pin G13

T12 tubes are one of the largest fluorescent tubes, which you will find with a diameter of 1.5 inches. As with larger sizes, they typically offer high energy consumption compared to the other models. Their luminous efficacy typically ranges from 50 to 70 lumens per watt, which is much lower than that of the T8 and T5 tubes. But they operate at higher wattages, resulting in higher energy consumption.
As it is built with old tech, its lifespan is usually lower. All you need to consider is the higher maintenance cost, and they lose brightness faster over time. Most consumers face flicker issues from time to time due to the higher levels of mercury.
More LED Light Options to Replace Fluorescent Tubes
Besides LED tube lights, you can use other LED light types as a replacement for fluorescent tubes. These are as follows:
| LED Light Type | Features | Best Use Cases |
| LED Panel Lights | • Flat and slim panels that provide glare-free light • Ideal for ceiling grids. | Offices, conference rooms, schools |
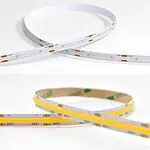
| LED Strip Lights | • Flexible strips with LEDs that can be cut to length • Used for accent or task lighting. | Under cabinets, display cases, and decorative lighting |
| LED Batten Lights | • Linear fixtures designed as direct replacements for fluorescent battens | Warehouses, garages, industrial spaces |
| LED Troffer Lights | • Recessed fixtures for drop ceilings • Offer high efficiency and even light distribution. | Commercial offices, retail stores, and healthcare |
How to Convert Fluorescent Tubes to LEDs? – Stepwise Guidance
Here is the professional guide on how you can convert the fluorescent tubes to LEDs efficiently:
Step 1: Turn Off the Power
Before you do anything, check and ensure you have disconnected the power supply. Disconnect the power directly from the circuit breaker where the fluorescent fixture is operating.
For your safety, use a non-contact voltage tester and ensure that your fixture is properly disconnected.
Step 2: Remove the Fluorescent Tubes
Now gently twist the connected sockets and disconnect the fluorescent tubes from the fixtures. These types of tubes typically contain mercury, so you need to handle them very gently to avoid breakage. The best is that you wear gloves and safety glasses during removal.

In case you are disconnecting multiple fixtures, safely store the disconnected tubes in a place or manage to recycle them according to local regulations.
Step 3: Disconnect the Ballast (If Applicable)
Now, depending on the model or types you have chosen, you may need to remove or bypass the fluorescent ballast. If there is a ballast-bypass tube at hand, make sure the ballast is properly disconnected.
Also, remove it from the place as the LED tube runs directly on the line voltage. If it is plug-and-play LED tubes, keep the ballast just in its place. But check and ensure that the type of LEDs is perfectly compatible with the ballast to avoid flickering or damage.
Step 4: Install Non-Shunted Tombstone Sockets (If Necessary)
If you are rewiring the fixture for ballast bypass, replace the existing shunted tombstone sockets with non-shunted tombstones. Non-shunted sockets have separate electrical connections for each pin, and this is important for single-ended LED tubes.
But with the shunted sockets, you will find both pins internally connected, so that the power flows through both at once. It is best for the double-ended LED tubes where there is not much to change the sockets.
Step 5: Wire the Fixture
Rewire the fixture according to the LED tube type. Follow the manufacturer’s instructions in this instance. If it is ballast bypass tubes, connect the line and neutral wires directly to the appropriate tombstone sockets.

Must ensure a secure connection with wire nuts, electrical tape, and proper insulation. Before you complete the installation, check the LED tube’s datasheet and ensure it follows electrical safety codes. It is important for safety.
Step 6: Install the LED Tubes
Now is the time to insert the LED tubes into the fixture sockets. After you have done it, check and ensure a secure fit. Confirm all the tubes are compatible with the fixture size and the recommended base types.
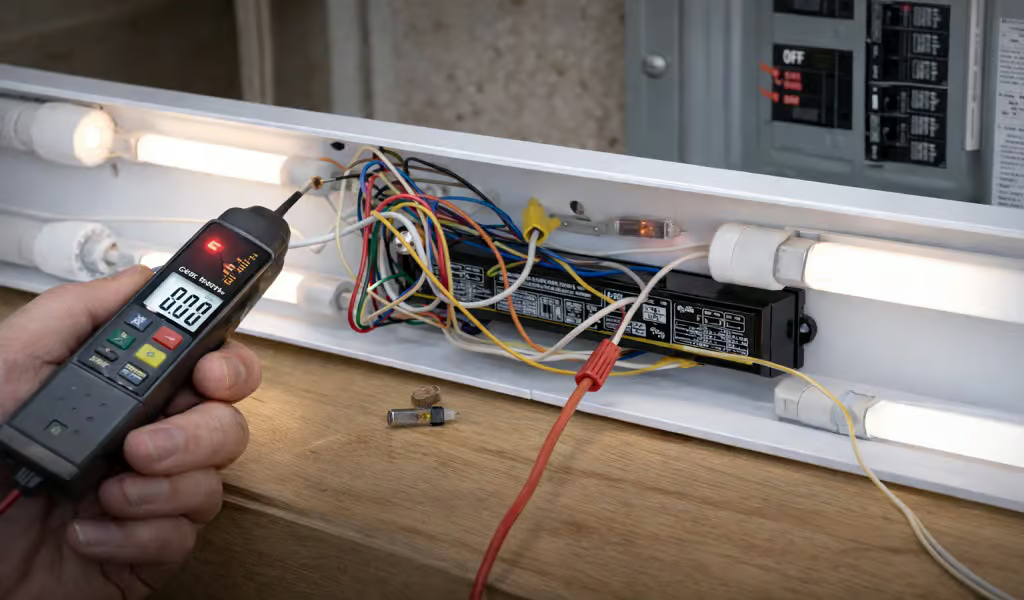
Step 7: Restore Power and Test
After installing the LED tubes, just connect the power back on at the circuit breaker. Make sure to carefully connect with the safety of yourself. When done, just switch back on and check your new LED lights to see whether they light perfectly or not. It should not flicker or buzz after you have switched it on.
If you face any issues, double-check the wiring or whether you are running into any compatibility issues. In this case, it is better to contact a professional technician for further assistance.
How to Choose the Best LED Tube for Your Needs?
1. Wattage and Energy Efficiency
Choose the LED tube with high light efficiency, which should be above 100 lm/W. It helps you to save energy and reduce electricity costs. Also, check that the wattage perfectly matches your lighting needs. Don’t overdo the power, as it will increase your electricity bill.
2. Lumens (Brightness)
Lumens mainly indicate the brightness. You need to select the Lumens based on space size and purpose. With the higher ones, you can run the task lighting, and the LED with the lower lumen helps to set the ambient. If you are choosing the 20W bulb, 2800 lm is sufficient for optimal performance.
3. Color Temperature (Kelvin)
All you need to do is select the color temperature based on the ambiance. Warm light with about ~2700K is great to set the ambient space. Besides, you can choose the neutral temperature ranging between 4000–5000K at your kitchen setup or at the place of your house where you need sufficient light for tasks.
4. Color Rendering Index (CRI)
Higher CRI, which is about 80, means you will find the color appearing more natural and vibrant. You can choose it to perform any essential tasks that you will need in the cooking in the kitchen or any other detailed work. All in, set up this so that you can ensure the best accuracy.
5. Environmental Impact
LED tubes tend to consume less energy and even last longer. It is approximately 40,000–50,000 hours. By this longevity, you reduce waste and carbon footprint compared to other fluorescent tubes. Individuals with environmental concerns can easily choose and operate this.
How Much Will You Save? A Cost Breakdown of Fluorescent to LED Conversion
It will definitely be a smart investment switching from fluorescent to LED lighting, as it significantly reduces your energy bills and maintenance costs. Though you can expect to have a higher upfront cost for the LED, through the superior energy efficiency and longer lifespan, you can save a lot.
Here is the estimated cost breakdown for each method and how much you can save from Fluorescent to LED Conversion:
| Conversion Method | Upfront Cost (Per Tube) | Energy Savings | Lifespan |
| 1. Direct Replacement LED Tubes (Plug-and-Play) | $10 – $15 | 40-60% energy savings | 40,000-50,000 hours |
| 2. Bypass Ballast LED Tubes (Direct-Wire) | $12 – $18 | 60-75% energy savings | 50,000+ hours |
| 3. Hybrid LED Tubes | $15 – $20 | 50-70% energy savings | 40,000+ hours |
| 4. LED Retrofit Kits | $30 – $50 | 60-75% energy savings | 50,000+ hours |
| 5. Replacing Entire Fixture with LED Fixtures | $60 – $150 | 70-80% energy savings | 50,000+ hours |
Troubleshooting Common Issues While Converting Fluorescent to LED
While converting fluorescent tubes to LEDs, it is normal to face some issues. However, don’t worry, go through the list below and get the instant solution to avoid the hassle:
Incorrect Wiring
LED tubes typically require different wiring than fluorescents. Even if everything is set, but the power still doesn’t come up, check the wiring connections, especially neutral and live wires. If there is any doubt, call an electrician.
Ballast Compatibility Problems
Type-A or plug-and-play LED tubes often don’t work well with older or faulty ballasts. It just results in flickering or no light. So, before you start installing, make sure you have double-checked the compatibility. In this instance, you can switch to ballast-bypass or Type-B LED tubes.
Faulty Power Supply
Loose wiring, blown fuses, or tripped breakers prevent the LED tubes from working. If you are facing the same issues, use a voltage tester and check the power supply. Fix wiring or consult an electrician if needed.
Overheating
After the installation is done, users often find that the LEDs are overheating at an extreme level. It mostly happens due to poor ventilation. Ensure proper airflow or use fixtures designed for LEDs.
Frequently Asked Questions
In Closing
Now that you have come to know all the best options to convert the fluorescent to LED, it is time to move on to smarter, more efficient lighting. No matter if you choose simple plug-and-play tubes, ballast bypass solutions, or a full fixture upgrade, you can ensure huge energy efficiency while reducing cost.
However, to have the best and modern LED lighting options, starting from modern linear bar, LED strips, to custom LED Neon Flex, consider reaching out to LEDYi today and enjoy the benefits of modern lighting!